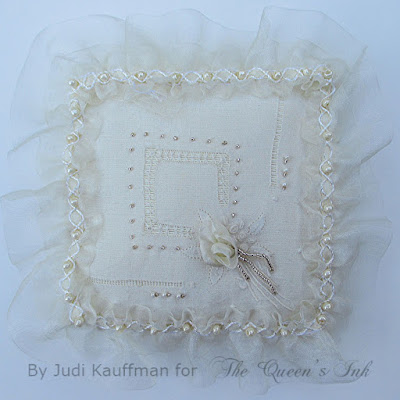
I love
beautiful handkerchiefs. I have many that once belonged to my mother, as well
as quite a collection I’ve built on my own over the years. I scour estate sales
and bring them back as souvenirs from my travels. Even the most amazing rarely
cost more than a dollar and if they’re damaged they usually go for pennies.
That’s
the case with the one I used for today’s project. It was in such bad shape that
I didn’t feel bad about quartering it to make sachets. There are tiny little
rust spots that wouldn’t wash out and one corner was badly torn, holes that
could easily be camouflaged with lace.
Some
other ideas before I launch into the how-to:
- Instead of sachets, make pin cushions! (Sew an inner pillow out of sturdy muslin, fill it with sand.)
- Instead of square sachets, make circles or rectangles. The design on the hanky will guide you in this regard.
- Create a little pillow and sew a matching coverlet for a doll’s bed.
- Create a collage with assorted pieces from several damaged hankies. Back with quilt batting and a rigid board; display in a frame. Or skip the board, add fabric as well as batting and make a quilted wall hanging.
PHOTO
GALLERY
Take a
few minutes to look through the photo gallery before reading the instructions.
If you’ve done a lot of sewing, the pictures may be all you need. If you’re a
beginner, read on.
INSTRUCTIONS
1.
Find vintage (or new) hankies that won’t be ruined by being cut into pieces. If
you start with a new hanky, wash it several times and/or tea dye it so it looks
old!
2.
Gather matching and coordinating fabrics, lace, ribbon, and beads.
3. Cut
hanky into squares. Line each square with matching or contrasting fabric. Cut a
square the same size for the back of each sachet. If using a contrasting
fabric, use that same color for the back.
4.
Embellish the front with seed beads, pearls, flower beads, ribbon rosettes,
embroidery. Use thread to match the hanky, or use contrasting thread as an
accent.
5.
Baste or pin the front and the backing square with right sides facing. Sew a
small pillow, leaving one side open a couple of inches so it can be turned
right side out. (Tip: Add border lace when sewing the two pieces together, or
hand-sew it later.) Clip the corners, turn, stuff, hand-sew the opening. Tip:
Add lace border during this step.
6. Sew
on any additional lace embellishments (gathered pieces, rosettes, leaves, border
lace trim, etc.)
SUPPLIES
- Visit The Queen’s Ink to find ribbons, trims, charms and more
- Hankies
- Matching and/or contrasting fabric
- Sewing thread
- Seed beads, pearls, lace, trims, and other embellishments
- Fiberfill


These are simply gorgeous, Judi!
ReplyDeleteAha; a great use for those hankies I've been saving. Very nice, Judi
ReplyDelete