Sunday, June 30, 2019

I LOVE My Traveler’s Notebook by Judi Kauffman

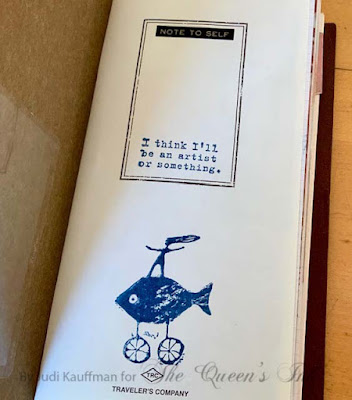
I did it! After resisting and resisting and giving myself all sorts of reasons why I didn’t need one, I finally splurged on a Traveler’s Company leather notebook and several different inserts, and some bands to hold the inserts in place. I now have grid-line, heavy watercolor paper, and Kraft brown booklets available at all times, along with the plain white writing paper booklet that came with the cover.
It has turned out to be a really good investment. I’m asking myself if owning something so nice can enhance creativity and I think the answer is yes. It’s like buying a really good pair of comfortable shoes that give me better balance: Worth it!

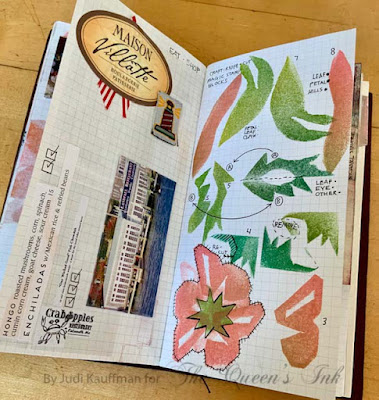
It’s sturdy and versatile and it’s been so much fun drawing, stamping and collaging onto the pages. (Is ‘collaging’ a verb? If not, let’s make it one!) I like how the cover is getting scratched from being hauled around in my purse or tote bag. It’s not meant to be kept on a shelf, it’s meant to be used - and used hard and for a long time.
I like having so many options available at my fingertips. Now I’m just wondering why I didn’t invest sooner. Yes, I used the word ‘splurge’ because this is not something that can be found at an office supply store for a dollar-ninety-nine, but life is short and I won’t ever have to buy another one because I’m sure it will last longer than I will!

So far, I  have I added:
A Shimmer Sheetz tab for the start of each insert booklet.
Stamping (lots of Magic Stamp!)
Random collage: Part of a label from a T-shirt, pieces from menus, photos and parts of a brochure from an exhibit of Sailors’ Valentines, drawings - some of them  tabbed-in between grid pages (held with sturdy torn scraps of mulberry paper for the tabs). 


In addition to the Traveler’s Notebook Cover, here’s what else I picked up from The Queen’s Ink to take with me:
  • Insert booklets
  • Zippered pouch
  • Pens (white, black, gold)
  • Glue stick
  • Roll of double-sided adhesive
  • Small scissors

Thursday, June 27, 2019

Your Highness: Art Cards by Judi Kauffman for The Queen’s Ink

Remember that early TV game show called Queen for a Day? If so, I know how old you are! If not, it’ll be easy to find with a click or two. The premise was that several women vied for prizes by telling their sob stories. It always struck me as bizarre that anyone would spill secrets that way in hopes of getting a washing machine. Fast forward: That show seems so tame, so innocent.

But I digress. I’m here today with a tutorial that has a different premise: We are ALL queens and princesses, and not just for a single day! Patti Euler, our own Head Royal has taught that for years, right?

Prove it to yourself by doodling a queen or princess or two (or TWENTY) to display around your home and send to friends. The samples shown are postcard-size, but could be scaled up for wall art or down for ATCs.


Instructions:

1. Round the corners of a piece of mid-value to dark cardstock (navy, cranberry, olive green, black, dark red, etc.)

2. Using a pencil, draw guidelines for a simple crown, angled head, skinny arms, small waist and big skirt on the cardstock! (Practice on white paper till you get some shapes you like, or use the template below.)

3. Color AROUND the queen with a gold opaque paint pen, covering your guidelines. Doodle the details of the crown, face, jewelry and dress using black, white, and turquoise opaque ink pens as shown or as you prefer!

4. Now do another one. And another one. And another one! The more you draw, the more inventive and interesting and uniquely your own the royals will become!!!

5. Options: 
Use a long vertical rectangle so you can show the entire skirt, legs and feet.
Draw a king or prince instead of a queen or princess.
Add gems, glitter dots or other embellishments.
Use patterned paper or pieces of gel prints (collage!) for the skirt.

Supplies:
  • Cardstock in dark or mid-range colors
  • Corner rounder punch or scissors
  • Pen-touch in Gold (Sakura of America)
  • Gelly Roll in White (Sakura of America)
  • Pigma Micron in Black (Sakura of America)

Saturday, June 22, 2019

Found Poetry: Part 2 by Judi Kauffman for The Queen’s Ink

“I’m inclined to keep going.” This is one of the lines in a piece of Found Poetry from my little book, shown above, and it sums up my current mood.

The first installment of Found Poetry was a starting point - just the words and phrases, cut and pasted onto prepared pages (gel prints and handmade papers glued into a small Moleskine journal). 
This installment shows how the pages have evolved over the last couple of weeks: Stamping, doodling and some coloring and shading added. Are they done? For now, yes. But who knows...
Have you done any Found Poetry yet? Give it a try!!!
Another option: I’ve been cutting and pasting, but another avenue for Found Poetry is to paint and draw over almost all of the words on a page in a book (no cutting), leaving only those words or phrases that become free verse. (It’s got the look of a censored or redacted document...) That’s what I’m trying next! Stay tuned for Found Poetry: Part 3.

SUPPLIES:
  • Red Castle rubber stamps
  • Ink pad(s) in color(s) of choice
  • Colored pencils
  • Pigma Micron pens in black (Sakura of America)
  • Gelly Roll pen in white (Sakura of America)

Thursday, June 20, 2019

Easy Peasy Accordion Books by Judi Kauffman

Accordion (concertina) books are fun to make and super easy. I made a batch of them to give as gifts and they are a terrific item for craft sales. You can make them in any size with just a few pages or a long strip with many pages. These measure a tad over 2.5” x 3.5”, sized for Artist Trading Cards, small photos, found poetry, quotes, or for trying out new supplies and unfamiliar techniques.


INSTRUCTIONS:
1. Cut two pieces of chipboard for covers.

2. Fold good quality paper for the inside pages, starting and ending with a ‘valley’ fold (an even number of pages). Pages should measure about .25” smaller than the cover.

3. Cover the exterior of the covers with lightweight, soft (easy to fold) paper. Mulberry paper and other handmade paper is ideal. Fold to the back at least .5” for a finished look.
4. Adhere the folded pages.


5. Embellish the covers. Shown: Small strips cut from gel printed Shimmer Sheetz. Optional - add embellishments to the inside of the covers.


Supplies:
  • Chipboard
  • Handmade papers
  • Drawing paper (for inside pages)
  • Double-sided adhesive tape
  • Glue stick
  • Gel printed Shimmer Sheetz
  •  (Or other flat embellishments)

Saturday, June 15, 2019

Thick White Lines: Part I by Judi Kauffman for The Queen’s Ink

I found a dispenser of correction tape among my ‘vintage’ (AKA ‘old and forgotten’) office supplies! Remember typewriters? 

Rather than toss it into the trash, I decided to draw with it as if it were an opaque white paint pen with a precise, wide nib. I love the results. Today’s sample is just the beginning. I can envision using metallic braid to embellish/embroider across the white lines to create the look of a couching stitch. Cut or torn into pieces there are many possibilities for collage, and I want to experiment with different substrates, stencils, and acrylics, too.

INSTRUCTIONS

  1. Cut a piece of black cardstock into postcard-size pieces (4.5” x 5.5”) and begin to draw with correction tape. Embrace imperfection; allow the lines to meander, overlap, and end at angles.
  2. Fill in the background with lots of bright, shiny opaque gold leaving a narrow band of black around the white lines and shapes.

YOUR TURN
Try your hand at the technique I’ve explained.
Make postcards or card fronts.
Work directly into an art journal or traveler’s notebook.
Alternatively, look at your own stash of forgotten supplies and figure out a new way to use the item(s).

Supplies:
  • Pen-touch Metallic Paint Marker in Gold, Copper, or Silver (Sakura of America)
  • Black cardstock
  • Correction tape

Tuesday, June 11, 2019

Coloring With Copics - Royal Oddballs


Join Nancy for a new Copic markers class featuring the Oddball Queens from Stamping Bella. In this class, you will make two cards with emphasis on Copic techniques for coloring skin. hair, and clothing. We will also spend some time creating mixed media backgrounds for the cards so be prepared to get your hands inky! Details are below. All necessary techniques are taught in class. Seats are limited, so sign up today! CLASS FEE $25

Tuesday, June 25, 2019, 1:00 PM – 3:00 PM 
Register online or call the Queen’s Ink at (301) 497-9449

BRING TO CLASS: The list below reflects the Copic markers that Nancy will use in class. You can follow along using the same colors OR substitute colors based upon your personal Copic collection. Please bring all your markers to class and make sure your Copics are marked with Washi tape or some other means of identification. Markers are available for purchase at The Queen’s Ink. Students will receive a 10% discount on Copic markers. Nancy will be available prior to class to help with selection.

PLEASE NOTE: You must bring your own markers to participate in class. If you need markers, please contact The Queen’s Ink in advance of class. If you wait until class time, you may not be able to purchase the markers you need.

  • BV02: Prune
  • BV13: Hydrangea Blue
  • BV17: Deep Reddish Blue
  • BV31: Pale Lavender
  • BV34: Bluebell
  • RV55: Holly Hock
  • RV63: Begonia
  • RV66: Raspberry
  • Y02: Canary Yellow
  • Y15: Cadmium Yellow
  • Y19: Napoli Yellow
  • E000: Pale Fruit Pink
  • E01: Pink Flamingo
  • E04: Barley Beige
  • E11: Lipstick Natural
  • W0: Warm Gray No. 0
  • W3: Warm Gray No. 3
  • W5: Warm Gray No. 5
  • 0: Colorless blender
Other Supplies - Please bring:
  • Distress Oxides in Tumbled Glass, Peacock Feathers, and Blueprint Sketch
  • Three ink blenders for use with Distress Oxides
  • Scissors suitable for fussy cutting
  • Foam adhesive squares
  • Tape runner adhesive or double-sided tape


Sunday, June 9, 2019

Found Poetry by Judi Kauffman for The Queen’s Ink

Via email, my friend Jhone introduced me to ‘Found Poetry’ and it sounded so interesting that I thought I’d give it a try. Her postcard arrived before I’d started, and that sealed the deal! 

The method is simple: Cut words and phrases out of damaged books or old magazines, spread them out and combine them to form free verse or rhymed poems. Glue the found poetry onto postcards or into an art journal or traveler’s notebook, add them to a collage for the wall, or whatever you want. 

I was so surprised at what appeared in front of me, almost as if the cut pieces rearranged themselves to create something without any planning or input from me! The unconscious mind takes over, that’s for sure. In other words: Poetry HAPPENS!
I had already glued gel prints and beautiful papers into a small Moleskine journal so I wasn’t starting on plain pages, though you could! (The gel prints include my own plus prints from a swap with friends Debbie and Toni.)
At this point, I consider the pages to be almost done, but I wanted to step away for a few days to decide what to do - if anything!

Please comment: 
WHAT DO YOU THINK? Should I add stenciling, stamping, collage? 

Instructions:
1. Prepare the pages in an art journal or traveler’s notebook. Glue down gel prints or print, stamp, stencil and paint directly onto the pages. Alternatively: Work onto rectangles cut from painted or gel printed cardstock to make postcards, card fronts, or art to frame!

2. Cut out a LOT of words and phrases from damaged books and magazines. Spread them out in the lid of a box or on a tray. Hint from Jhone: Line the work tray with black paper so it’s easier to see the little strips of paper!

3. Arrange and rearrange the words and phrases until they flow like poetry. 

4. Arrange on the background till pleased with the look of the page. Glue down the words and phrases.

5. Add more to the pages - collage, stamping, stencils, doodling with pens or paint.

6. Optional: Seal pages with a light coat of matte medium.

Supplies:
  • Traveler’s Notebook, Moleskine or other journal with heavy weight paper
  • Scissors
  • Magazines, damaged books
  • Gel prints
  • Stencils, stamps, paint, pens, markers
  • Adhesive of choice
  • Optional: Matte medium

Monday, June 3, 2019

Stamping Bella Shadow Box by Nancy Sheads for The Queen's Ink


I’ve got quite a long blog post for you today so you better pull up a chair and grab a cup of your beverage of choice. I don’t often write tutorials, but today’s project was worth the extra effort.

Saturday was the first day in quite awhile that I didn’t have anything planned, so I spent the day on a project that I’ve been mulling about over the past few days. I’ve been inspired lately by the work of my student Jill Killeen who has been creating fun shadow boxes with Stamping Bella stamps.

As you know, I’ll be teaching a class at The Queen’s Ink on Tuesday, June 25th featuring the Oddball Queens from Stamping Bella. After I prepared the class samples, I realized that The Queen’s Ink now has its own exclusive line of washi tape which would have been perfect for the class cards. So I wanted to put together another project featuring the Oddball Queen of Hearts by Stamping Bella and the new washi tapes from The Queen’s Ink. I happened to have a RIBBA 9×9 frame from IKEA which is perfect for shadow boxes so my idea for this project started coming together. It was also the perfect opportunity try out some new crafting tools and products that I had recently purchased.

So here it is! I was going to apologize for the shadows, but after all, it IS a shadow box!
The full supply is shown below. I’ll tell you up front that the design evolved along the way with a lot of experimentation. As a result, I threw a lot of different products at it. But don’t let the extensive supply list scare you. We all know that the ancillary hobby to papercrafting is collecting papercraft supplies. So you probably already have a lot of the supplies in your stash or have products that you could easily substitute.

Before Starting

Before I started, I cut my card stock and foam sheets (see supply list) as follows:
  • One 9 x 9 inch square from a 12 x 12 sheet of Graphic 45 Loveliest of Them All
  • One 6 x 6 inch square from a sheet of Bazzill Black Licorice card stock
  • One 5.75 x 5.75 inch square from a sheet of Neenah 80# card stock
  • One 5.75 x 5.75 inch square from a sheet of Darice White Foam Sheet
  • One 5.5 x 5.5 inch square from a sheet of Darice White Foam Sheet

I wanted to create the background by building up layers of colors and textures. I recently purchased some of the Picket Fence Studios Life Changing Blender Brushes so this seemed like a great opportunity to try them out. On a 5.75 x 5.75 inch sheet of white card stock, I started blending Distress Inks in Tea Dye, Tattered Rose, and Antique Linen. After the ink dried, I splattered the background with Nuvo Mica Mist in Nebula Blue, Fresh Pear, Antique Gold and Violet Lustra.

One of the new crafting tools in my stash is the Wendy Vecchi Make Art Stay-tion. I thought this would be perfect for stenciling since the magnets would hold the stencil in place without tape. I spread a thin layer of Tacky-When-Dry Gel Medium from The Crafters Workshop on portions the Tim Holtz Gradient Square Layering Stencil with a palette knife. Afterwards, I immediately cleaned the stencil and palette knife with water and set the background aside to dry.

In the meantime, I covered a couple of scraps of white card stock with the new washi tapes exclusive to the Queen’s Ink — Crowns, Let Them Eat Cake, Lavender Baroque, Queen of Hearts, and Harlequin. I used the Hearts die and the Small Stitched Circle Stackable die from Lawn Fawn to cut the cardstock into shapes. Later on, I only used the die cut circles so I’ll save the hearts for another project.

And now – the fun part! True to it’s name, the gel medium is tacky when dry so I started to lay down gold, silver, and copper gilding flakes on the stenciled area. Once the stenciled area was covered, I rubbed lightly to adhere the flakes to the gel medium and remove any excess. I was going to take a photo midway, but to be honest I was up to my elbows in gilding flakes so I can only show the end result. Difficult to photograph, but lots of texture and shine.

Putting It Together

I was running out of room in my work space so I started arranging and adhering all of the layers for the full background. I decided that the lower right corner of the background needed something extra so I stamped an image from Carabelle Studios’ Stains & Seams stamp set with Archival Ink in Jet Black.

Next:
  • I glued the pre-cut 5.5 inch square foam sheets to the back of the white cardstock (top layer).
  • I glued the pre-cut 5.75 inch square foam sheet to the back of the black cardstock (middle layer).
  • I stamped the sentiment in Versafine along the bottom of the 9 x 9 design paper square. I covered the ink with clear embossing powder and heat set the image (bottom layer).


  • I lined up the bottom layer on my Wendy Vecchi Make Art Stay-tion and held the paper in place with the magnets.
  • Using the magnetic ruler, I lined up and centered the three layers. Once they were in place, I glued the layers together.
  • I placed foam adhesive squares on the back of the die cut washi tape circles and arranged them on the top layer.
At this point, the background is complete as shown below. Time to start the Copic coloring!


Copic Coloring

To start, stamp the image on Hammermill Digital Color Copy (or any Copic compatible paper) with Amalgam Ink in Jet Black by Gina K. Designs. I’m providing only basic instructions here for coloring, but if you need additional help, take a look at the video by Elaine Hughes (AKA Marker Geek) for coloring this stamp. I was guided in part by her color selection so you will see many of the same markers.


SKIN

  • Working from dark to light, add depth and shading to the face (E04, E11, E01, E000)
  • Base coat the eye lids with BV31. Deepen the corners with BV34.
  • With BV31, draw a line under the lid to create a shadow across the eye.
  • Use BV31 to deepen the shadows around the eyes and the hairline.

HAIR & CROWN

  • For the hair, start with C7 to color the shadows at the base of the curls.
  • Work from dark to light (C5, C3, C1) to blend out each section of hair. Be sure that you do not lose the highlights.
  • For the crown, work from dark to light (Y19, Y15, Y02)
  • Base coat the heart with R24. Add R46 if you want to deepen the color.

CLOTHING

  • Starting with the folds in the dress, work from dark to light (R59, R46, R24) concentrating the R59 in the shadows and folds in the dress. Blend out with R46 and R24.
  • If you want additional depth, add C5 to the deepest areas and blend out from dark to light as necessary with the R markers.
  • For the center of the dress, work dark to light (Y19, Y15, Y02). Do the same with the binding (C7, C5, C3).
  • Base coat the hearts with R24. Add R46 if you want to deepend the color.

Bringing It On Home!

Once the coloring was complete, I used my Brother Scan N Cut to cut out the image. If you prefer, you could fussy cut the image. As an alternative, coordinating dies are available from Stamping Bella (see links below). Once the image was cut, I added foam adhesive squares to the back and adhered it to the background. After adding some sequins and jewels for extra bling, I framed the finished piece.

That’s it for today – hope you found a some inspiration. And be sure you check out Jill’s blog and send her a little love!

SUPPLIES

Paper: Hammermill Digital Color Copy 100#; Bazzill Cardstock in Licorice Twist; Princess Collection Loveliest of All by Graphic 45
Stamps: Oddball Queen of Hearts by Stamping Bella; Stains & Seams by Carabelle Studios
Inks: Amalgam Ink in Jet Black by Gina K. Designs; Archival Ink in Jet Black by Ranger; Versafine in Onyx Black by Tsukineko; Distress Inks in Tea Dye, Antique Linen, and Tattered Rose
Stencil: Gradient Square Layering Stencil by Stampers Anonymous / Tim Holtz
Washi Tapes: Washi tape in CrownsLet Them Eat CakeLavender BaroqueQueen of Hearts, and Harlequin by The Queen’s Ink
Dies: Small Stitched Circle Stackables by Lawn Fawn
Embellishments: Nuvo Mica Mist by Tonic Studios in Fresh Pear, Nebula Blue, Violet Lustra, and Antique Gold; Nuvo Gilding Flakes by Tonic Studios in Radiant Gold, Silver Bullion, and Sunkissed Copper; Nuvo Fine Detail Embossing Powder in Clear by Tonic Studios; Sequins in Not So Heavy Metal by 28 Lilac Lane; Wink of Stella in Clear by Zig; miscellaneous enamel dots.
Adhesives: Tacky-When-Dry Gel Medium by The Crafters Workshop; Therm O Web White Adhesive Foam Squares by Gina K. Designs; 3-in-1 Craft Glue by Beacon
Frame: RIBBA 9 x 9 frame available from IKEA
Tools: Life Changing Blending Brushes by Picket Fence Studios; Wendy Vecchi Make Art Stay-tion by Ranger; Misti Stamping Tool by My Sweet Petunia; Brother Scan N Cut
Copics: E000, E01, E04, BV31, BV34 (skin); C1, C3, C5, C7 (hair); Y02, Y15, Y19, R24, R46 (crown); R24, R46, R59 C5, Y02, Y15, Y19 (dress)