Tuesday, August 9, 2016

22 + 93 = _____ ? 14 x 2 = _____ ? By Judi Kauffman for The Queen's Ink


Simple arithmetic, right? Not necessarily. The first equation refers to how I feel after teaching Make an Impression and The Magical Land of Magic Stamp classes at The Queen’s Ink on August 6 and 7 and after spending both days helping with the Trunk Show event where my own limited edition rubber stamp sheets were for sale.

From the neck up I’m 22, batteries 100% recharged, my head so full of ideas that I’m surprised I don’t topple over, enough energy for three people and great memories spinning around like the gymnasts at the Olympics. From the neck down I’m 93 with tired feet and knees, ready for a nap right after breakfast, and if you asked me to carry my purse across the room I’d have to demur. 

So: 22 + 93 = 1. Yours truly.


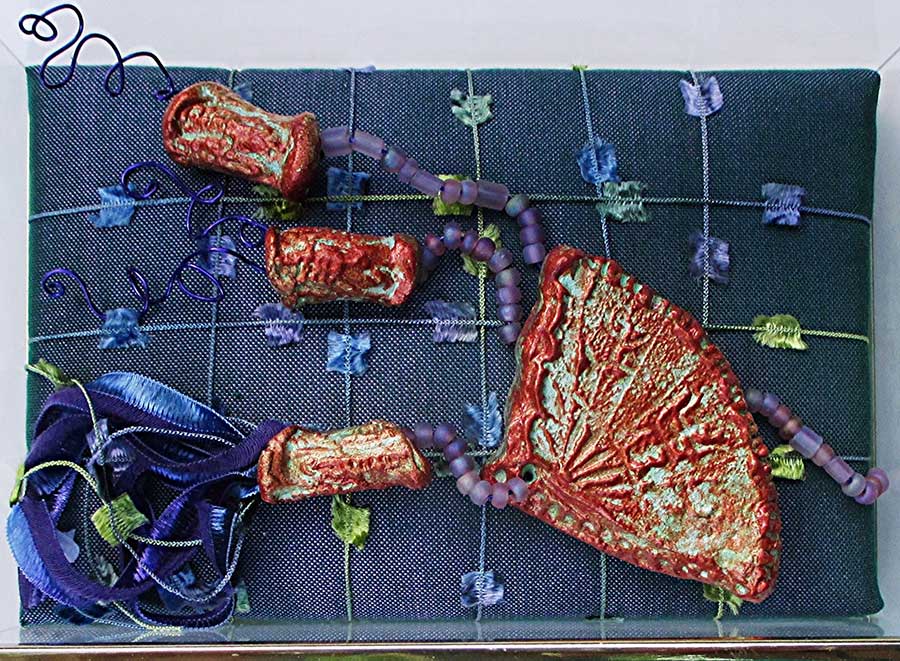
How about the second equation, 14 times 2? There were fourteen students in each class with some people attending both, so 28 people wasn’t the actual head count. But my version of math isn’t traditional. I’m factoring in the following facts: Each person created and/or painted well over a dozen pieces of Delight Air Dry clay (the count was higher on several tables). Factor in the 150 blocks of Magic Stamp that were used to stamp envelopes and folders and cardstock and newsprint (or went home in pristine condition, waiting to be used later). Multiply that figure by the number of ideas that were shared, the number of projects envisioned.

So: 14 x 2 = an infinite number.


I wasn’t the only one whose head was spinning! A student who has worked extensively with polymer clay thought that Delight was, literally, a delight. One student has already planned her own Magic Stamp class. (She’s going to teach the other teachers where she works.) Another is heading to India with stamps she bought, as well as a big stack of lightweight Magic Stamp blocks.

A little detour: I once put a carry-on suitcase filled with Magic Stamp blocks into the overhead bin of an airplane using only one hand to lift it and the men around me looked on in amazement and applauded, thinking (incorrectly) that I must be some kind of bodybuilder instead of just a person traveling with foam blocks!


The photos in this blog post are from the Make an Impression class. Photos and a re-cap of the Magic Stamp class will follow later.

The projects you’ve seen so far are the samples I made to illustrate how the clay pieces could be put to use.

The photo gallery that follows shows students’ work.

By popular request, we’re going to schedule a repeat of Make an Impression this fall! And we will have enough sheets of my deep etched red rubber stamps to have another trunk show. Magic Stamp classes will continue as well.

Be on the lookout for dates and times!


Tuesday, August 2, 2016

Wildflower Tags - By Judi Kauffman for The Queen's Ink


I’m back with my first project for August, a trio of wildly easy Wildflower Tags and a bonus tag that uses the same base layers but with a twist. Instead of wildflowers, it features three round embellishments and takes less than five minutes.


I had a double dose of inspiration: Tim Holtz’s Wildflower dies (it was a must-have set the minute I spied it) and Mother Nature’s wildflowers that are growing along the roads between here and the home of friends who live out in the country. I think that Tim really captured the delicacy and variety of these amazing plants, don’t you?

BEFORE WE START
You may want to look back at the card and tags I designed for a previous post (Royal Stamping). Or maybe you’ve got a great memory and already noticed a few things that feel familiar! Yes, I have used the same polka dot Washi tape, and I made simple tags again.

Why?

Because it’s a great way to connect the dots (pun intended), using the same supplies in several ways to show how versatile they can be. I don’t want to buy something, use it once and then never need it again, do you? Plus, I have a long attention span for things I like to do, and I just love making tags in small series. Stamped tags one time, tags with embossed and sanded Shimmer Sheetz and die cuts the next (or as I call it, working ‘By the Batch’ method…).

As a designer, exploring something in depth has always made sense to me. As a teacher, inspiring other people to do the same is one of the best ways I can think of to turn everyone into a designer! It’s easy to gain confidence when you make several of something – no ONE thing becomes too important or precious, making mistakes and figuring out what to do about them gets easier and easier.


INSTRUCTIONS
If you are an experienced paper crafter, scroll through the photos and head straight to the supply list. Make tags just like mine or use them to inspire your own versions.

If you are new to paper crafting, follow the steps below.

1. For each tag, cut a 3” x 5” rectangle from glittery cardstock or any solid color cardstock or designer cardstock that you prefer. (I used light pink and dark pink for the Wildflower Tags, sandy peach for the Bonus Tag.) Punch a quarter-inch hole, centered and about a half inch from the top edge. Cut off the corners at whatever angle looks good to your eye. Option: Use a tag-shaped cutting die. Design strategy – Use heavyweight cardstock for the base of your tag or glue two layers of lighter weight paper together.

2. Emboss a piece of Shimmer Sheetz with any dot pattern folder and lightly sand to tone down the shine and reveal the core color. Sand one side for raised dots, the other side for de-bossed dots. Rectangles shown measure 3.5” x 4” or 2” x 3.25” for Wildflower Tags, 2” x 4” for the Bonus Tag. (I chose Pink Iridescent and Light Pink Iridescent for the Wildflower Tags, Fire Opal Gemstone for the Bonus Tag.) Use a strong hold double-sided adhesive tape to adhere the rectangle to the tag, centered from left to right. If you want extra dimension, use foam tape. Design Strategy – Leave a border at the bottom equal to the border on the left and right sides, or allow the Shimmer Sheetz to extend all the way to the lower edge. It looks good either way.

3. Die cut lots of wildflowers. For strong contrast and bolder looking silhouettes choose black cardstock. For a softer look choose mauve or whatever color goes well with the cardstock and Shimmer Sheetz you selected.


4. Complete the tag fronts by adding the die cut wildflowers and Washi tape, or embellish further by combining vintage lace, buttons (with shanks removed), the die cut flowers and tape. For the Bonus Tag use only three round embellishments like buttons, oversized brads or low-relief dimensional scrapbook stickers (no wildflowers). Options: Glue only some sections of the flowers in place, leaving some areas free for added movement and dimension. Use Glossy Accents to add a bit of shine to selected areas of the flowers as shown in the photo below.


5. Add wide sheer ribbon tails, fine paper twine and a polka dot bead secured by a knot, or a polka dot ribbon loop to the top of the tag. Design strategy –Avoid thick or fragile elements like the button cluster or glass bead if your tags are going to be mailed in an envelope.


Things to Do With Tags: Tags can be used on gifts, card fronts, in art journals and tag books, or as ornaments.

SUPPLIES
  • Shimmer Sheetz in Pink and Light Pink Iridescent, and Fire Opal Gemstone
  • Sizzix 661190 Wildflowers Thinlits Die Set by Tim Holtz (7 Pack)
  • Dot pattern embossing folder(s)
  • Glittered cardstock in light and dark pink
  • Cardstock in black and mauve or other colors of choice
  • Ribbon, bead, cord
  • Washi tape
  • Buttons and other embellishments
  • Optional: Glossy Accents


Wednesday, July 27, 2016

Flock of Birds: Envelopes - By Judi Kauffman for The Queen's Ink


I’m back as today’s guest designer with a project that ranks high among my favorites – Envelopes! It’s kind of my signature. No plain envelopes. And since envelopes are inexpensive bits of ephemera, destined to be torn open and tossed out, they’re a wonderful surface for experimentation. Hope you’ll join me…

The project title, Flock of Birds, reflects the fact that I stamped a LOT of envelopes. Two dozen, to be exact, though I’m showing only nine of them here.


I’ve always worked ‘By the Batch’ method. In fact, that was the title of the last book I wrote*.

I picked a versatile stamp and stencil set by Nathalie Kalbach (available at The Queen’s Ink, of course, in-store or via mail order). It has a foam stamp with two sides (detailed and a solid silhouette), a cling-mounted rubber stamp, and a stencil with masking pieces.

My theory is this: If I’m getting out supplies and making a mess I want to have a bountiful outcome. Kind of like baking a double batch of cookies instead of a half-batch…plenty for later!

(*If you’re curious: My book is now discontinued, but it can sometimes be found on Amazon.com or eBay. It’s called By the Batch: Creative Cards, Postcards, Envelopes & More.)


INSTRUCTIONS

Throughout these instructions, I’m adding ‘Design Strategies’ (in italic font) – tips that explain not only HOW I did something, but WHY. Yes, it means more words to read, but I hope you find them useful!

1. Stamp a batch of A2 (or other) size envelopes using the three bird stamps from the set (two foam stamps, one rubber stamp). Use the stencil and sponged-on ink to add plants, or position stenciled branches in the bird’s beak. Refer to the photos for placement, taking care to position the bird(s) off to one side to leave room for a mailing label. Use a single bird, or several. Design Strategy: I used a large size homemade rainbow inkpad so the colors vary within each bird. If you don’t have a multi-color pad, solid colors work fine! I used only one bird stamp per envelope, but you can combine them so you have birds peeking in from both sides of the envelope. This works great with long #10 business envelopes.

2. Smudge and smear ink onto and around the stamped images. Also, lightly smudge inks onto some mailing labels. Set labels aside till step 4. Design Strategy: Stamp and cut out masks of the birds if you want to keep crisp edges. Use a sponge and skip the masking if you are going for a more random look with the colors.

3. Get out the colored pencils, a white opaque ink pen, and a couple of fine line black pens and add more color and detail. Refer to the photos to give you some ideas. Design Strategy: Stick with only a couple of colored pencils if you want your envelopes to resemble mine. Customize to suit your own eye – More colors, markers (but skip the paints – wet media will cause envelopes to ripple). As shown in several of the photos, especially the two below, you can add an eye to the bird even though there isn’t one on the stamp.


4. Add a mailing label to each envelope. The post office will thank you! Stamp the beak or a portion of the bird’s body onto a label and ‘fussy-cut’ it so that the bird will appear to look like it’s in front of the label, or holding it in its beak.


5. Smudge extra ink at the upper right if you want to highlight the spot for the postage stamp. Design Strategy: If you know what stamps you’re going to use you can plan the smudged area so it is just slightly larger than the stamp!


SUPPLIES
  • Stampendous n*Studio Bird Stamp and Stencil set by Nathalie Kalbach, NKCFS02  (Available at The Queen’s Ink, in-store or via mail order)


  • Dye inks in shades or brown, orange and red or colors of choice
  • Colored pencils in mustard and aqua or colors of choice
  • Pigma Micron 01 and 1 in black or other fine nib black pens
  • Gelly Roll Medium in white or other white opaque ink pen
  • Artist’s sponge for smudging inks
  • A2 smooth finish envelopes in ivory (shown) or colors of choice


Friday, July 22, 2016

Royal Stamping - By Judi Kauffman for The Queen’s Ink


Thank you so much for inviting me to be part of The Queen’s Ink blog!

For this, my first post, I thought it only fitting that I feature stamps that Patti Euler designed. I chose NB-034I, NB-031H, and SC-015D -- one stamp with text running up the side and across the face (Royal Beauty), one with no text (just the lovely face), and one that is text-only (a Shakespeare quote).

The key to the quick and easy card and tags is a limited palette: Predominantly espresso, teal, red, and shades of pink.


If you are an experienced stamper:

Scroll through the photos and head for your stamps, inks, and colored pencils to create your own version of the card or tags. I stamped an allover pattern on cardstock for the background, but designer papers are another option.


Beginners or anyone who wants to duplicate the projects precisely as shown:
I hope you’ll find the instructions thorough and easy to follow. I have included little detours I call ‘Design Strategies’ to explain the WHY of the projects along with the HOW.

If you have questions leave them in the comments section of the blog and we’ll answer as soon as we can. (I’m somewhat old-school and am not at the computer every day.)


INSTRUCTIONS
  1. Using Espresso or any dark color ink (Eggplant, Sepia, Navy) stamp images onto uncoated white cardstock. Leave an inch or two between the images for easy cutting and tearing. *Design Strategy: I rarely stamp in black or use black embossing powder. Other colors feel richer, more lively, unexpected, and more interesting to the eye.
  2. Cut out the stamped rectangles, with or without the attached words that are part of the stamp. Tear around the edges of the words to create separate elements, as shown, or if you prefer smooth edges use a craft knife and straight edge for all cutting.
  3.  Color with pencils and markers as shown or as you prefer. *Design Strategies: No need to be realistic! I used a bright teal marker to intentionally color outside the pupil on the eyes for one of the tags (it makes the Queen look so pretty, don’t you think?). I added a row of Glitter Flowers peel-offs on the eyebrows for the other tag, some Glitter Dots peel-offs to her headdress, and used a trio of colored pencils on the eyelids on the card. Instead of drawing spiral curls in a dark color, I used peach so they are a subtle element instead of a bold addition. Note that the torn edges around the quote and the words on one of the tags are colored with the same trio of colored pencils (teal on two sides, peach on the third side, raspberry on the fourth).
  4. Layer the elements onto tags made from stamped or purchased patterned cardstock or onto a side-fold 6” square solid color card base. *Design Strategy: To further unify the colors and incorporate another handmade touch, distress the edges of some of the layers and the edges of the tags with dark teal (shown: Stream). Use a sponge dauber to add the ink or simply pull the edges of the cardstock across the inkpad. Beginners, practice with scrap cardstock till you get the hang of it.
  5.  Embellish and accent the card and tags. I used Glitter Flowers and Glitter Dots (peel-offs), scallop punched circles (cheeks and base of crown), feathers (crown), and washi tape. *Design Strategy: Transparent Glitter Flowers and Glitter Dots allow the colors below to show through! (I love ‘em!) Trace the cheek line at the left side of the stamped face onto lightweight paper and use it as a template for cutting the scallop punched circles. This ensures that the curve will match the stamped image when glued in place.
  6.  Reinforce the holes on the tags with a contrasting circle. Add fibers. *Design Strategy: I used a reinforcement die from a ‘Tags & More’ die set, but you can punch a 5/8” circle with a 1 /4” circle in the center if you don’t have the die. I saved the small center circles and used them as an accent at the bottom right corner on the card! (Did you notice them?
SUPPLIES
  • Stamps: NB034I, NB031H, SC015D available exclusively from The Queen’s Ink
  • Inks in Espresso and Stream (Ranger) or other color(s) of choice
  • Colored pencils in teal, peach and raspberry (Prismacolor) or colors of choice
  • Dark teal marker (Winsor & Newton ProMarker)
  • Uncoated white cardstock
  • Uncoated pale aqua cardstock (6"x12", folded to 6"x6")
  • Scalloped circle punch or die
  • Washi tape
  • Paper glue or double-sided adhesive tape
  • Foam dots
  • Transparent/Silver Glitter Dots and Glitter Flowers peel-offs (Elizabeth Craft Designs)
  • Other embellishments - feathers, fibers
  • Scissors

Thursday, July 21, 2016

A Royal Welcome - Judi Kauffman Joins The Queen’s Ink Blog!


We did it! We lured Judi Kauffman out of retirement to teach classes for The Queen’s Ink, and now we’ve enticed her to post on our blog several times a month.

Judi is endlessly inventive, and we’re so excited to have her as part of the team. She has been my friend since the day we met, and a designer, writer, teacher, and product developer within the craft industry for a long time. She carved her first linoleum block while she was still in grade school, later went on to earn a BFA in printmaking and an MFA in fibers. These days she spends endless hours doing what she calls ‘creative puttering’…I could live happily ever after in her studio where we have frequent play days.

We look forward to your comments and hope you’ll invite your friends to subscribe to the blog. If you have a project in mind that you’d like to see, Judi’s happy to put your requests into the lineup.

Please join me in giving Judi a royal Queen’s Ink ‘WELCOME’!

Patti

Saturday, March 12, 2016

The Queen's First Ever Garage Sale

Friday, March 18 / 6:00 - 8:00
Saturday, March 19 / 10:00 - 5:00
Sunday, March 20 / Noon - 5:00

Do you have old craft supplies that are bringing you down? Have you switched focus and wonder what you're ever going to do with those supplies/tools/stamps that SEEMED like such a good idea at the time? Would you like to get rid of that stuff and get some dough so you can buy all the cool new stuff? We have come up with the perfect solution.... We're excited to announce The Queen's Ink FIRST EVER "GARAGE SALE".

If you have items you'd like to sell but don't want to have your own sale or list them on an online/auction site, we'll sell them for you! Here's how it will work:

1.   Decide you're going to participate in the sale, call right now, then stop by The Queen's Ink for a set of garage sale tags. You'll get 60 tags for $10.

2.   Sort through all your stuff and price the castaways. Bundle items, sell higher priced items individually, make themed packs---how you use your 60 tags is totally up to you! Put a price on each of your tags (just write it with a pen or marker), and bag or package them. (Please, ONLY craft supplies---we reserve the right to reject odd things like old shoes, baby chairs and handbags.)

3.   Deliver them to The Queen's Ink between now and Monday, March 14th at 5:00 p.m.

4.   No need to worry about the items that don't sell---we will arrange for them to be donated! Visit The Queen's Ink on Monday, March 21st and receive a ROYAL GIFT CERTIFICATE totalling your proceeds from the sale, minus our 20% commission (which will cover the cost of staff, credit cards, and set-up/execution).It's that easy!

For those of you interested in buying, SAVE THE DATE NOW! The garage sale will open Friday, March 18th at 6:00 p.m. with a "charity sale"! For admission to this preview sale, bring a can or package of dog food (to be donated to BARKS) and canned goods (for the Howard County Food Bank). When the doors "open" at 6:00 p.m., you'll get first chance to buy!

The official opening of the Garage Sale will be Saturday March 19th at 10:00 a.m. Everyone is welcome---no admission fees! There will still be PLENTY of goodies of all types for all shoppers. We will continue the Garage Sale on Sunday March 20th from Noon to 5:00 p.m.

But wait---there's more---on Monday, March 21st, all remaining items will be half price! Shop from 10:00 a.m. to 6:00 p.m., your last chance to get your bargain goodies until our next sale!

All remaining items will be donated to the art departments of several local schools.


Sunday, February 14, 2016

Guest Artist Workshops were just announced...

We're super excited about our first two Guest Artists for 2016... Kelly Kilmer and Laurie Mika. Kelly will be with us Memorial Weekend (Friday, May 27 - Sunday, May 29) for five great workshops with a focus on fabulous. Everyone who took her workshops during her last visit stated that they were "among the best" they had ever taken. The techniques Kelly employs in her art journals and collages will help you take your journals to the next level. These photos are from her Painted Connections project (Friday's class).


Laurie Mika, well known in the polymer clay world, brings her special talents to share on June 18-19. She'll guide you in successful creating with clay and your finished pieces will make you proud! This photo features projects from her Handmade Hamsas & Hearts workshop.


Plans for a Royal Yard Sale are in the works, so look forward to details on this fun event, as well as additional workshops we're working on.


Wednesday, February 10, 2016

ManneqArt Workshop - An opportunity to create wearable art...


We are pleased to announce a fabulous workshop in the unique ManneqART style. This is a great opportunity for all of our Royal Customers who are intrigued and interested in learning about wearable art. A renowned wearable art professional will lead this workshop, with participation by clothing designer Lee Anderson, as well as our very own Queen Patricia (you can applaud here or curtsy if you must). Your creation may be eligible to compete in the annual ManneqART competition, although that is certainly not required. The Queen as well as several of our customers have participated in the competition, and can provide you additional information about the competition should you decide to enter. Feel free to call the shoppe and ask questions! Below is a copy of the original brochure about this workshop opportunity. 

DESIGN AND BUILD YOUR OWN 
UNIQUE WEARABLE SCULPTURE!
 
Saturday February 20th 2016--ManneqART Workshop
Partnering with the James Renwick Alliance (JRA), 
of the Renwick Gallery in Washington, DC
 
JRA members and non-members: please join us on Saturday, February 20, 2016 from 10 a.m. to 4:30 p.m. for a day of fun and creation! Design and build your own unique wearable sculpture with help from the experts at ManneqART.
 
Robert Reed, the creator of OMGEODE! DIAMOND IN THE FLUFF, NOWHERE TO HIDE and other award winning "sculptures on the human form" will lead attendees in the design and creation of your own wearable artwork. ManneqART's founder and clothing designer, Lee Andersen, will also be participating.  To see other art works by Robert Reed and other wearable artists, visit the ManneqART Gallery at www.manneqart.org.
 
You may work individually or as a team, the only requirement is to have fun, play and create.
 
Creations may be eligible to compete in the 2016 ManneqART annual competition. The four competition themes for 2016 are: 
  • Flora
  • Fauna
  • Action
  • Androids.
 A cache of material will be provided but also feel free to bring your own materials to play with. We recommend you bring a bra to build onto. (guys: a bra can be purchased at walmart for $5). We also recommend bringing TWO of any item (from the dollar store?) from your attic (ideally with holes to allow them to be attached to the bra easily).
 
Lunch will be provided.

Tickets Prices are:
  • $75 for JRA members AND The Queen's Ink Royal Customers (you know who you are!)
  • $90 for non-members
  • $75 ManneqART Artist (if you have submitted work for past ManneqART competitions)
  • $5 Students (student ID required) for lunch cost
 
Location
Lee Andersen Studio
Andersen Becker
9010 Maier Rd #104
Laurel, MD 20723


To register online, visit the ManneqArt website. Call The Queen's Ink for more information and/or for offline registration.


Thursday, December 11, 2014

Merry Christmas & Happy Everything!


Vagabond raffle winner Doris Wray
with The Queen
Thanks to all of you who helped make our 14th Birthday Bash a big success. Your generosity was amazing, and we're so pleased that your "birthday" gifts have been donated to Operation Gratitude in support of our military at home and abroad. Our raffle for a Sizzix Vagabond raised an additional $125 to help defray the cost of postage for soldier care packages. Congratuations to long-time customer Doris Wray!

Our Creative Connection night meets this Saturday (December 13th) and we have space for more artists. This event is an opportunity for art enthusiasts to gather on a regular basis (monthly) and share the creative process. This is NOT a class; rather, it is a SPACE... for friends to start or finish a project... cards, journals, wall art, etc. Look forward to lots of laughter and fun, and an opportunity for help and collaboration from fellow artists. In addition to a space for you (WARNING--not a table of your own), you will enjoy snacks and drinks; access to the classroom's diecutting machines, dies and texture fades; and, 20 percent off the regular price of all in-stock products.

Since the shoppe is open until 9:00 Monday through Saturday from now until December 23rd, we are opening up the studio to our customers for creative play. We will be working on our cards, last minute handmade gifts, and just "playing", and would love to have you join us. Take a break from shopping, baking, and wrapping, and get some one-on-one Zentangle coaching from Patti on Tuesday, make paperdolls with Lolly on Wednesday, watch a gelli plate demo with Terry on Thursday, OR just bring your half-finished projects and enjoy the camaraderie of the season with us.

We think it's important right now to remind all of you of the importance of feeding our souls with our art, which helps keep us grounded. We will continue to order new products as they are introduced and restock all your favorites; however, as with all of you, we have had to adjust to the changes in the economy, and have (necessarily) adjusted our restocking intervals to more closely reflect the times. We've seen this trend with our suppliers, our fellow business owners, and our customers, and ask that you work with us to determine how we can best meet your expectations while observing the bottom line. If you have ideas about classes and new products, please forward those to us (queens@queensink.com), as we are trying to plan for the next 6 months... more cards, fewer cards; paper engineering (or not?); product techniques and demos; whatever ! We want to hear from you, our most valuable resource of all. 
  
Patti's promise for the New Year (but beginning now) is to write a Facebook post EVERY day... there's always something to say, right? Go to the bottom of this newsletter and "LIKE" us... don't miss out on her daily musings. She (with a little help now and then) will report on shop happenings, new products, maybe a cool technique she discovers... or anything else that you might suggest to her. Lolly wants you to mail-bomb her inbox if you see that she's reneging on her promise!
  
One last note... we will be closing at 3:00 p.m. on Christmas Eve, so tell those last-minute shoppers in your life that they have a deadline!

We just received Seth Apter's workshop descriptions and project photos, so those will be posted in the next few days. workshops. We're so excited to host him the weekend of February 28th-March 1st, during which he will teach a 3-hour workshop and two all-day workshops....all brand new for 2015! Watch Facebook for the big reveal!


Monday, August 11, 2014

Checking in....

Yes, it's true.... this blog is woefully out of date. One of the hazards of social media is the requirement for consistency and continuity in posting. That said, I find it extremely difficult to make blogging a priority when I'm pressed with other activities in the shop. Oh, and don't get me started about tweeting... who can actually say ANYTHING in 140 characters...geez, not me! Of course there is news to share, products to tout, classes and projects to describe... but not so much time, it seems. I do endeavor to update our website regularly, including the Products section where I list new products that arrive. Typically I don't list standard supplies like tape and glue and rulers, but I do post information about new and restock of the various inks, tools, dies, stamps, and ephemera, and I always keep the publications list current, as new editions arrive from Stampington and Interweave.

The Classes section of the website is the most used and most edited part of queensink.com, and I update it at least weekly as new workshops are finalized and descriptions/project photos are updated. Please feel free to call and ask about a particular class listed, or let us know about classes you'd like to see in our offerings. I work with Patti to develop a monthly schedule of classes, both guest artist one-and-done workshops and regularly scheduled classes (tags, Zentangle, Ink Paper Scissors, cigar boxes, etc).

Okay... that's it for "housekeeping", except to say that I'm going to TRY to be a more regular blogger, but only with the promise from Patti, Terry, and Kate that they will provide me "newsy" stuff to discuss. I'm spending next week in Nashville, listening to great music, people-watching, and relaxing, and not posting to this blog (but maybe the Queen will have something to say :-)

We had three great workshops with guest artist Kass Hall in early August, who brought along many examples of her journal pages, sure to awe. Kass lives in Australia, is rather new to the international teaching circuit, and was a delightful guest, including her fun accent. Kass taught a workshop called "Make It Big" during which the students created a two-panel work of art. Patti's finished masterpiece is shown (right).

Yesterday, our very own Laura Hummel guided a large group of enthusiastic students through the creation of personal travel journals, complete with partially decorated pages, sewn signatures and a beautiful, unique cover. She provided numerous examples of completed travel journals from her adventures far and wide, in which she documented interesting sites, sounds, people, and included ticket stubs, menus, photos and other memorabilia that she collected and tucked into the journal that lived in her purse for the duration of her trip. What a great way to capture the memories while still fresh! We're looking forward to another class with Laura in September, already nearly full. I'm certain we'll convince her to continue offering journal workshops at the shoppe! In the meantime, come for a visit, and watch the website, blog, and Facebook for updates on shop happenings.
LK

Wednesday, February 5, 2014

StencilGirl Friendzy

Greetings! HonorĂ© here.

So, what happens when, one day you're on the job that you've had 18 years and counting, and you suddenly go crazy? Well, if your name is Mary Beth Shaw, you quit and create a business: Stencil Girl Products - quality artist designed stencils for mixed media artists by mixed media artists. Among the many  artists whose stencils are now available are: Sue Pelletier, Pam Carriker and Joanne Sharpe.

And guess what: they and Mary Beth Shaw are coming to the Queen's Ink, March 5th & 6th (Wed/Thurs), 2014.

The Queen's Ink is delighted to host the very first ever StencilGirl Friendzy at this royal mixed-media retreat. Over the two days, you will work with all four artists/teachers, learning techniques and tricks that will help you carry your stencil art to the very next level. ..and, drum roll please: You will receive four limited-edition stencils, created by each artist and a 58-page 9 x 12 bound journal.

Check out all the details here and call the Queen's Ink to register.

I was in the Queen's Ink Shop Monday and new product from CHA is beginning to arrive…like these luscious Faber Castell Double Scoop gelatos. Yummy!


And the shop is expecting new Graphic 45 pattern papers any day now… Be sure to check the Queen's Ink website for up-to-the-minute arrivals of all the new products.

Been cold enough for you? I am slowly "thawing out," hoping that our winter weather is soon to be over though I don't have much confidence, considering that all the groundhogs I know (about) saw their shadow three days ago. Not a good sign. But hey, nothing we can do but grin and bear it, pull out our art supplies and drown our sorrows in making great art -  in our journals, on canvases, tags, with new paints or a new box of crayons and perhaps a stencil or two.

Look forward to seeing you soon. Stay warm.

Cheers~