

Here’s an easy recipe for a big batch of fun mixed media
collage cards, bookmarks, and a coil-bound notebook!
MIX TOGETHER –
Ink-Only Backgrounds from yesterday’s post:
AND
Stamped pieces created with rubber stamps from Red Castle
sheets called Texture Plates 1 and 2 (available exclusively from The Queens Ink)
shown last week:
FOR CARDS –
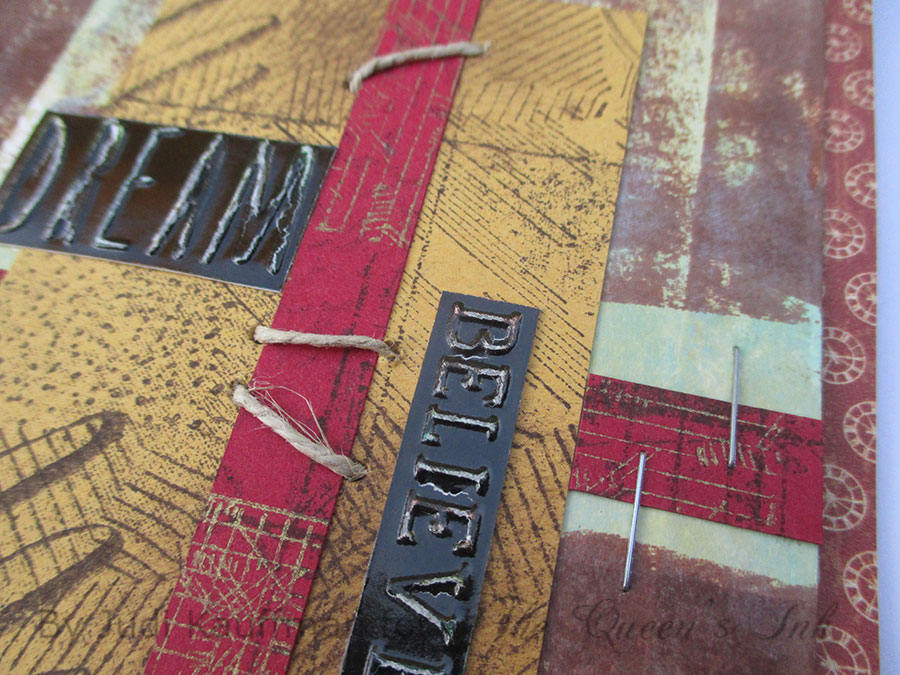
- Tear and/or cut assorted pieces
- Mix in other collage papers
- Layer, arrange and rearrange till pleased
- Glue, sew and/or staple the layers
- Add more stamping
- Embellish with word stickers, paper clips, safety pins, brads, key charm, and such
- Add details with pens
- Add color with pencils, markers and paint pens
(Cards shown: 5 x 7, 4.25 x 5.5, 6 x 6, and ATC-size 2.5 x
3.5)
OTHER PROJECTS –
Cut strips for bookmarks, laminate
Laminate 5.5 x 11 notebook covers, punch covers and inside
pages, coil-bind
Add a calendar pad and punch a hanging hole, create a ribbon
loop
PHOTO GALLERY –
Dip into the photo gallery for inspiration and ideas. (The
supply list follows the gallery.)


SUPPLIES -
- Red Castle Texture Plates 1 and 2
- Stamped papers created with Red Castle Texture Plates 1 and 2
- Solid color cardstock
- Patterned papers and cardstock
- Ink-Only Backgrounds from yesterday’s tutorial
- Inks
- Assorted rubber stamps (eyes, arrows)
- Embossing folders with words and phrases
- Tim Holtz idea-ology ‘Clippings’ word stickers
- Low-relief embellishments
- Pigma Micron pen 01 in black (Sakura)
- Pen-touch in Gold Metallic (Sakura)
- Colored pencils
- Twine
- Awl to pierce holes for sewn elements
- Needle with large eye (to sew twine)
- Brads (round, square, triangle, dragonfly)


what a lot of samples. ty for yet another fun idea.
ReplyDelete