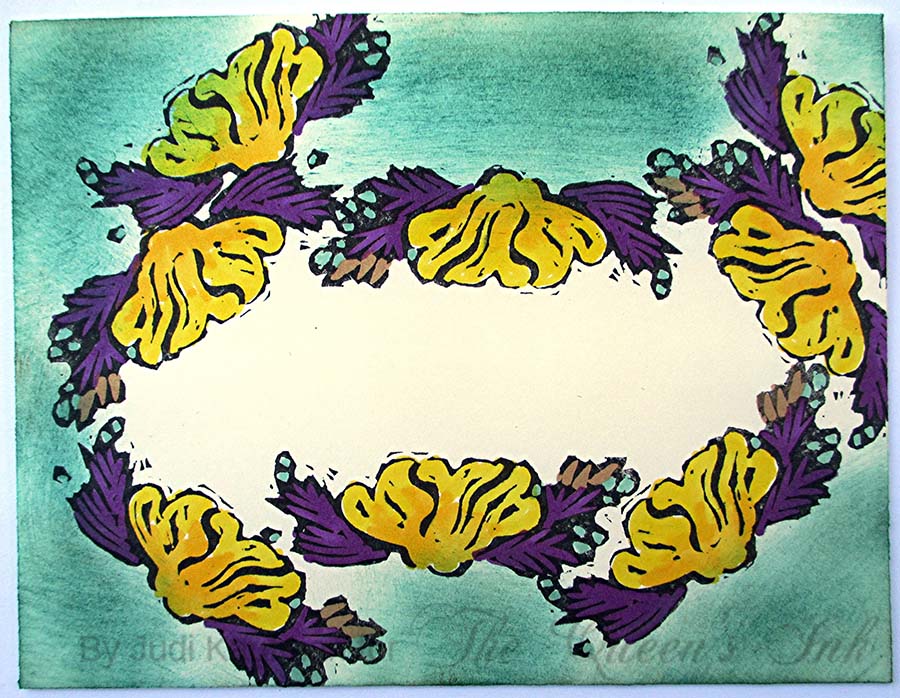
Wednesday, November 14, 2018

Carving, Cutting & Coloring By: Judi Kauffman


I devoted a recent blog post to stamp carving and printing onto envelopes. This time I’m going to show how to use that same carved rubber block in a very different way: Instead of simply stamping and coloring, it’s time to stamp, cut and paste and combine, scan or photocopy, re-size, and color! It’s so much fun and the possibilities are endless. 

You’re welcome to print a copy of my flower and carve your own version of it for your personal use, or create your own unique stamp block. As shown, the carved stamp measures a mere .75” x 2.75”. Though my projects are predicated on flowers and leaves, yours does not have to stick with the same theme. 

The key is to see in a new way, to find surprises by cutting something up and reassembling the pieces! This could be done with a whimsical animal, a plant, or anything else that has multiple elements within the whole.

Please do not use a commercial rubber stamp for this project because copyright rules prohibit electronic reproduction (unless you own the copyright). By using your own original carved stamp, or mine with the permission I’ve given for personal use, that is not an issue. Alternatively, choose something that is offered as copyright-free. If you are new to carving, a quick Internet search will offer many stamp carving tutorials, classes, and books to consider.

Instructions:
1. Stamp the block dozens of times on thin paper. I chose off-white newsprint to show the process more clearly, but would recommend plain white copier paper.

2. Cut the stamped images into small sections and glue the pieces together to create individual flowers, flower clusters, frames, or whatever you want. A glue stick is perfect for this step. All of my new creations fit onto one piece of paper measuring 8.5” x 11”.
3. Scan the page and adjust the contrast so you have strong black on white images as shown in the photo below (printed on 8.5” x 11” computer paper). Option: If you do not have a scanner, go to a local copy center for steps 3 and 4. Contrast can be adjusted on a photocopy machine; images can also be easily re-sized.
4. Crop and enlarge sections of the scanned images so that when you print them they will be big and easy to color as shown in the photo below. Sizes range from about 2” to 6”. I printed onto lightweight cardstock and colored and doodled with my favorite markers and pens (see supply list). Choose traditional colored pencils, pastel pencils, watercolor pencils, watercolors or acrylic paint if you prefer. TIP: Though it is a bit more challenging to fussy-cut thicker paper, if you are using wet media you will need to print onto watercolor paper or heavier cardstock.


5. Cut out the flowers, leaves and frames that you’ve colored and use them for cards, calendars, art journals, or other projects. Alternatively, instead of fussy-cutting leave them within a rectangle, square, oval, or circle and color the background.


6. As you can see, I stuck to cards and fussy-cut all of the focal images. The samples above and the ones that follow will give you some ideas. Mix in patterned papers, sentiments (peel-offs and die cuts), ribbon and beads, gems, or whatever else suits your project. I die cut the words Hello and Friends from adhesive backed velvet sheets for a tactile touch. 
7. Pick the appropriate adhesives: Use paper glue to secure the paper layers in your cards and gem glue to secure the flat-back gems. My cards range in size from 5” x 7” to 8” x 8”. Size your projects as you prefer. Use foam tape if you want added dimension.


Supplies:
  • Markers
  • Sakura of America – Gelly Roll Medium in White
  • Carving block, bench hook, and carving tools
  • Scanner/printer/copier
  • Other – Gem glue, paper glue, glue stick; assorted scrapbook papers, lightweight white paper; white cardstock; black ink pad; flat-back gems; iridescent beads; sheer ribbon; corner and word dies; foam tape; Glitter Dots peel-offs (Elizabeth Craft Designs)

Monday, November 12, 2018

Secrets Tin by Judi Kauffman for The Queen’s Ink

I love covering and decorating tins. Recently, a friend who knows about this hobby of mine surprised me with half a dozen SUCRETS brand cough drop boxes. The lettering on the lid is raised, making it more difficult to camouflage the words, but I figured out a way around the problem: Turn the word into SECRETS!

Here’s how it started:
Here’s how it looks with an E in place of the U. The textured area is a piece of embossed and lightly sanded Shimmer Sheetz backed with double-sided adhesive sheet covering the area below the silver stripe:
Cover the letter U with a narrow blue rectangle, adhered with glue formulated for non-porous surfaces (the tin). Options for the letter E: Use a white sticker. Draw on the blue rectangle with a white opaque ink pen, hand- or die cut a simple sans serif E.

Optional:  
Cover the bottom of the tin with a piece of Shimmer Sheetz (lightly sanded/flat or altered with alcohol inks).

Supplies:
  • SUCRETS brand cough drop tin
  • Shimmer Sheetz in color of choice
  • Double-sided adhesive sheet
  • Blue cardstock
  • White cardstock or pen
  • Alphabet die
  • Craft knife 
  • Self-healing cutting mat
  • Embossing folder
  • Sanding block

Wednesday, November 7, 2018

New Copic Class! Winter Greetings - Tuesday, November 20, 2018

Join Nancy on Tuesday, November 20th for a new Copic marker class featuring winter themed stamp sets from Power Poppy. We’ll make two cards in this class, with emphasis on basic Copic skills such as ink blending. Details are below. All necessary techniques are taught in class. Seats are limited, so sign up today! CLASS FEE: $25


Tuesday, November 20, 2018, 1:00 PM - 3:00 PM
Register online or call the Queen's Ink at (301) 497-9449


BRING TO CLASS: The list below reflects the Copic markers that I will use in class. You can follow along using the same colors OR substitute colors based upon your personal Copic collection. Please bring all your markers to class and make sure your Copics are marked with Washi tape or some other means of identification. Markers are available for purchase at The Queen’s Ink. Students will receive a 10% discount on Copic markers. I will be available prior to class to help with selection.

PLEASE NOTE: You must bring your own markers to participate in class. If you need markers, please contact The Queen’s Ink in advance of class. If you wait until class time, you may not be able to purchase the markers you need.
  • BV01: Viola
  • BV23: Grayish Lavendar
  • V20: Wisteria
  • Y11: Pale Yellow
  • Y15: Cadmium Yellow
  • Y19: Napoli Yellow
  • G20: Wax White
  • G21: Lime Green
  • G46: Mistletoe
  • BG70: Ocean Mist
  • B18: Lapis Lazuli
  • B21: Baby Blue
  • B23: Phthalo Blue
  • E25: Caribe Cocoa
  • E35: Chamois
  • E81: Ivory
  • E84: Khaki
  • E87: Fig
  • C1: Cool Gray No. 1
  • C3: Cool Gray No. 3
  • T8: Toner Gray No. 8
  • 0: Colorless Blender
OTHER SUPPLIES: Please bring
  • Scissors
  • Foam adhesive squares
  • Tape runner adhesive or double-sided tape

Tuesday, November 6, 2018

Carving Department Chip off the Old Block By Judi Kauffman

There it was, tucked among the Halloween stamps: A block I’d carved about a decade ago! It had always been kept in the drawer with the rest of my flower stamps, but it had somehow decided to move. I took it as an omen that the block wanted to come out and play and I decided it must have asked a ghost to carry it to the spot where I would find it. 

Originally, I had used the stamp as an accent at the top of writing paper and note cards. But this time I decide to whip up a batch of envelopes, the perfect project for experimenting with a small hand-carved image measuring a mere .75” x 2.75”. The black ink pad was already handy from Halloween cardmaking; I picked out three inks in fall colors, envelopes in two sizes, and added my go-to Winsor & Newton ProMarkers to the mix of supplies on my work table. 
If you have never carved a stamp before, now’s the time to give it a try! Feel free to print out my flower if you want to make your own version of it, and size it up if you want a larger stamp. There are many online stamp carving tutorials so I won’t go into detail about the technique here, but I’d like to offer some tips:

*Buy an inexpensive bench hook to ensure that you will never cut your hand! 

This simple tool will hold the block in place while you carve, allowing you to use your non-dominant hand to hold the block so it is positioned against the back of the bench hook, and your dominant hand to carve in a forward motion (away from your body and away from the other hand).

*Allow the stamp to retain evidence of the human hand at work.

Unlike commercial rubber stamps with perfect lines hand-carved blocks are imperfect; therein the beauty of them is revealed.
*Tools needed for carving rubber blocks or erasers don’t have to be pricey. 

It is only when you get into carving wood blocks instead of rubber that you’ll want finer quality tools and a stone for sharpening them.


Instructions:
1. Use the photos for inspiration. Stamp a small hand-carved flower repeatedly to create frames and borders on a series of envelopes. Choose black or another dark color for the stamping. 

2. Use an artist’s sponge to smudge inks on, around, and between the stamped flowers.

3. Use markers to color in and/or around the stamped flowers. Don’t worry about being precise. Hand-carved stamps and free-wheeling random coloring are a good combination. 

Options: 

If you don’t want to carve a stamp, substitute a commercial stamp with a similar shape and size – small enough to repeat on an envelope to create frames and borders. 

If you’re careful, stamps carved from soft blocks last a very long time – mine is evidence of that fact – but for an even more durable stamp, carve wood or linoleum instead of a soft carving block.

Whip up some matching writing paper or note cards to use with the envelopes. A set makes a great holiday gift.

If possible, buy postage stamps that coordinate with your color palette. Or create custom postage stamps to match! They cost more than standard postage, but it can be worth the splurge.

Supplies:

  • Carving block
  • ProMarkers (Winsor & Newton) or markers of choice
  • Envelopes in assorted sizes
  • Carving tools and block, bench hook
  • Black plus three or more other dye-based inks


Wednesday, October 24, 2018

Mixed Media Paper Dolls or Ornaments by Judi Kauffman for The Queen’s Ink

Once upon a time, there were dozens of paper crafting magazines – both print publications and online. For over thirty years, I was a writer and designer for many of them. Almost all have ceased publication, but I retained the copyright to my projects, words and photos. Back issues of some magazines can be found on eBay and at yard sales, but Scrapbooking.com Magazine, an online-only publication, has totally disappeared.

I thought it would be fun to share some of the Scrapbooking.com Magazine articles from my archive, hoping that the ideas will be as useful now as when they were first published. Many of the products are still available, and where that is not the case there are easy substitutions. 

Let’s start with mixed media dolls! (I have totally revised and updated the copy to suit The Queen’s Inkling.) 

IF THERE IS ENOUGH INTEREST I WILL TEACH THIS PROJECT AS A CLASS AT THE QUEEN’S INK THIS WINTER. Please call the store if you want to be on the list. Do NOT leave your name and phone number in the comments section of the blog.
The two mixed media dolls shown today can stand alone as art objects or they can be incorporated into a collage or art journal. This time of year, you can think of them as angels and hang them as tree ornaments.

Design Strategies – Basic Instructions:

1. Start with a square or narrow rectangle cut from heavy weight paper or cardstock for the body. Shown: Embossed cardstock, silk screened paper. (Option: Create your own stamped, stenciled, or gel printed papers!) Reinforce with chipboard for added stability if needed. Don’t worry about making a realistic shape.

2. Use knotted netting for the legs or arms. Again, don’t worry about realism – once you have a face in place your brain will ‘read’ the netting as limbs.

3. Stamp a face on an egg shape. Optional: Add a die cut flower or decorative circle as a halo.

4. Stamp or stencil wings or make them out of foil scraps. 

5. Embellish to complete as shown or as you prefer! The dolls shown include ball fringe, a dimensional butterfly, snowflake gems, Asian coins secured by red brads, orange half-circle feet.

6. More options:

Make a 2-way doll (a good choice for ornaments that will be viewed from both sides) by adding another face plus more embellishments to the back. These elements can be duplicates of the front or totally different! For example: The front can be a human face and the back can be an animal.

Instead of a stamped face, use a photo!

Make a big batch of dolls so you can give them to friends and family. 

Supplies:
  • Adhesives for paper, fabric and metal
  • Stamp of a person’s or animal’s face
  • Stamp or stencil for wings
  • Inks, paints
  • Assorted papers
  • Small scale ball fringe or other trims
  • Low-relief embellishments (coins, gems)
  • Brads
  • Dies (egg, decorative circle or flower)
  • Metal scraps
  • 6” wide netting

Saturday, October 20, 2018

Laurel Burch Christmas – Part Two: Envelopes By Judi Kauffman for The Queen’s Ink

[photo C]
I’m going to let the photos do the talking, just like last week. Laurel Burch’s Christmas stamps do all the work – just stamp and color (or not!). 

Pick an ink and stamp cats and dogs, or just cats, or just dogs (as shown) or mix in gift boxes, birds, or whatever combination strikes your fancy. Be sure to leave an open area for the name and address. I chose basic black, but bright red, dark green, or vintage brown would be great options. 

Get out some markers and colored pencils. Turn on holiday music to get you in the mood, listen to a podcast, or visit with a friend, and before you know it, you’ve got a big batch of envelopes in which to send your cards and flat paper ornaments!


Supplies:

  • Laurel Burch Christmas stamps
  • Ink in black or color(s) of choice
  • Envelopes in color(s) of choice - A2 or size(s) of choice
  • Markers, pens, colored pencils

Wednesday, October 17, 2018

Laurel Burch Christmas – Part One: Cards and Ornaments By Judi Kauffman for The Queen’s Ink


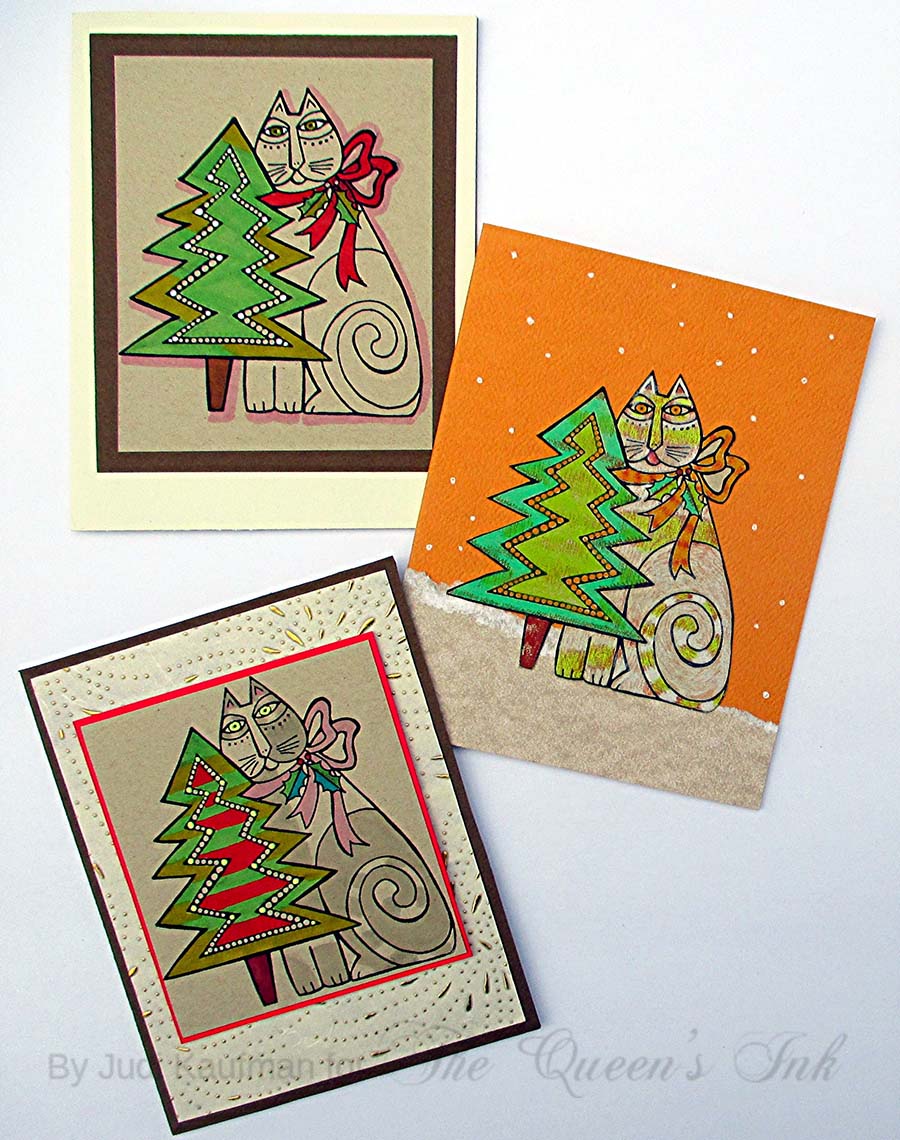
I’m getting ahead for the holidays, making my usual big batch of cards and flat, easy-to-mail ornaments. This year it’s all about cats and dogs and horses and birds thanks to my newest Laurel Burch stamps and dies.

Patti has been doing her best to keep them in stock, but they do seem to fly off the pegs at the store so don’t miss out!
Instead of instructions, I’m going to let the photos do the talking. I stuck with tan cardstock, black ink, colored pencils and markers. Circles are die-cut. Layouts are simple. The fun is in the coloring and layering. It’s a cliché, but true: The possibilities are endless!


Tune in next time for a big batch of envelopes, stamped with some of the same images.

Supplies:

  • Laurel Burch holiday stamps and dies (Stampendous)
  • Ink in black or color(s) of choice
  • Cardstock in assorted colors
  • Patterned papers
  • Circle dies in assorted sizes
  • Markers, colored pencils, pens
  • Narrow ribbon
  • Metallic braid
  • Hole punches (quarter- and eighth-inch)
  • Paper glue
  • Foam squares
  • Optional: Decorative stickers, glitter dot stickers

Thursday, October 11, 2018

Halloween Envelopes by Judi Kauffman

I'm part of Stampendous's 31 Days of Halloween, a month of projects published on their blog, and my tutorial, published on October 7, includes Halloween stamps by Andy Skinner that Patti has ordered for The Queen's Ink. I designed some spooky envelopes for mailing Halloween cards. (If you've been following The Queen's Inkling, you probably already know that I absolutely LOVE stamping and decorating envelopes...)

Check out the tutorial at this link, then please come on back to do your shopping.

Monday, October 1, 2018

New Copic Class! Celestial Celebrations - Tuesday, October 16, 2018, 1:00 - 3:00 PM

Join me at the The Queen’s Ink on Tuesday, October 16th for a new Copic marker class featuring the Laurel Burch Celestial themed stamp sets from Stampendous. We'll make two cards in this class, with emphasis on basic Copic skills such as ink blending. Details are below. All necessary techniques are taught in class. Seats are limited, so sign up today! CLASS FEE: $25

Tuesday, October 16, 2018, 1:00 PM – 3:30 PM 
To register, call the Queen’s Ink at (301) 497-9449


BRING TO CLASS: The list below reflects the Copic markers that I will use in class. You can follow along using the same colors OR substitute colors based upon your personal Copic collection. Please bring all your markers to class and make sure your Copics are marked with Washi tape or some other means of identification. Markers are available for purchase at The Queen’s Ink. Students will receive a 10% discount on Copic markers. I will be available prior to class to help with selection.

PLEASE NOTE: You must bring your own markers to participate in class. If you need markers, please contact The Queen’s Ink in advance of class. If you wait until class time, you may not be able to purchase the markers you need.
  • RV13: Tender Pink
  • RV14: Begonia Pink
  • RV17: Deep Magenta
  • RV19: Red Violet
  • YR04: Chrome Orange
  • Y02: Canary Yellow
  • Y15: Cadmium Yellow
  • Y19: Napoli Yellow
  • YG07: Acid Green
  • BG02: New Blue
  • B24: Sky
  • B66: Clematis
  • B69: Stratospheric Blue
  • E000: Pale Fruit Pink
  • E00: Cotton Pearl (formerly Skin White)
  • 0: Colorless blender
OTHER SUPPLIES:  Please bring
  • Scissors suitable for fussy cutting
  • Foam adhesive squares
  • Tape runner adhesive or double-sided tape.