Saturday, April 18, 2020

Creative Puttering While Quarantined: Magic Stamp Printing with a Crushed Candy Tray By Judi Kauffman for The Queen’s Ink

At times like this I turn to two favorite things: Magic Stamp blocks and candy! Turns out that the two work well together. The empty divider tray from a box of treats be crushed flat (stomping on a tray with your foot is very therapeutic - you can pretend you’re kicking the coronavirus right in the teeth!), and then pressed against heated Magic Stamp blocks to create wonderful patterns, like those shown here.
One round block was pressed at the crossed lines of four sections, one was pressed over a single section, and the rectangle was pressed along six of the sections where a long line slightly curves.
After stamping, look for flowers, animals or other hidden treasures. Outline, add color with markers and pencils. As shown below, I’m turning the circles into large flowers and have found, but haven’t yet colored, smaller flowering plants in the area below the large blossoms. It’s my ode to spring! I have to do something about the brown grass - I think green paint is in my future.
YOUR TURN
When Clearsnap closed late in 2019, Patti wisely snapped up several cases of Magic Stamp blocks so they are still available to you! The circles have disappeared from the planet, but you can easily cut the blocks with scissors or a craft knife to make your own non-rectangular shapes!
  • Stamp on adhesive-backed paper and then fussy-cut shapes.
  • Stamp on envelopes.
  • Work directly into an art journal or traveler’s notebook.
  • Use acrylic paint and stamp on fabric.
*****Important: Wash the block immediately if using paint or permanent inks. Paint will harden the block, some solvent-based inks can degrade the foam. All other inks easily wash off with soap, warm water, and a paper towel or rag.

Wednesday, April 15, 2020

Keeping Creative While Quarantined: Found Alphabet and Numbers By Judi Kauffman for The Queen’s Ink

Here’s a fun scavenger hunt that can be done in the house or garage: Find letters and numbers among the odds and ends that surround you! The letter X is a paint tool, the Q is an eraser, the Y is a zipper, the number 7 is part of a torn shopping bag, the plastic T protected the prongs on the plug for our new food processor!

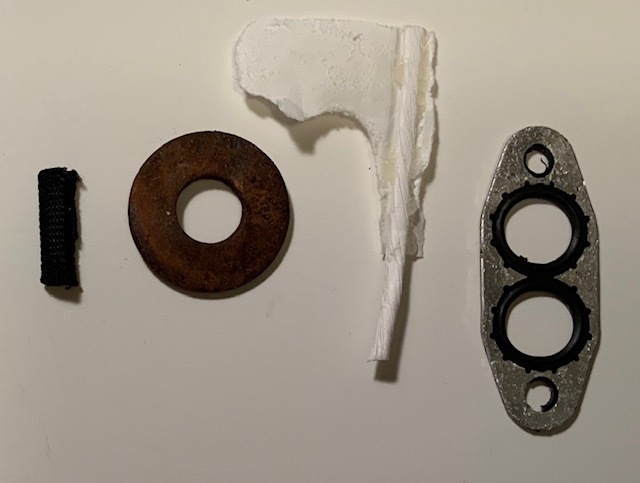
This will be more fun when we’re no longer quarantined. I found the rusty nail J, metal washers O and zero,, wood scrap A, and plastic B while taking walks around the neighborhood before the coronavirus pandemic. Alas, I wouldn‘t risk picking up such things right now.
YOUR TURN
  • If your home is neat as a pin, create the letters and numbers from scratch by hand-or die cutting simple shapes to combine or trim with scissors as needed. (Two circles for the number 8, a slim feather for the number 1 or letter I, the right half of the number 8 plus a straight strip for the letter B, and so on.
  • Find letters and numbers in magazines.
  • Look through your paper scraps - leftovers from die cutting will often yield interesting letter forms and numbers!
  • Draw animals or people posing as letters and numbers.
  • Take a photo of each separate letter and number so you can make color or black and white photo prints to spell out words, names, and dates. Frame your creation!
  • Add photo prints or collage to your art journal.
  • *The actual ‘found’ letters and numbers are too thick for a journal, but could be framed in a shadow box!
  • Trace the photo prints, re-size the tracings so the alphabet and numbers are close in scale, unless you like a mix of varying sizes. Cut your own stencils from the tracings! (The U and Y are so much bigger than the other letters - that’s why I’m suggesting re-sizing.)

Monday, April 13, 2020

In Praise of Sunflowers! Watercoloring with Distress Inks. By Nancy Sheads for The Queen's Ink


GOOD AFTERNOON EVERYONE! It seems like forever since I’ve seen those of you who are local. Like many of you, we are sheltering in place and hoping that better days will be here soon.

Sheltering in place is a lot like retirement, except that I have more toilet paper. And like retirement, I thought my house would be a lot cleaner now that I don’t get diverted by running errands or visiting friends. And I have even more time to craft….

However, the past few days it seems like nothing I’ve colored has turned out the way I wanted. I’ve torn up a lot of failed colored images. Some days are like that although I’ll admit that I’ve had several in a row now. So I decided to ditch my Copics for a few days (GASP!) and play with some other mediums.

As some of you know, I’m a frustrated watercolorist, but this seems like the wrong time to give that another shot. But I do understand Distress Inks — how they react with water and how the colors blend. So I pulled out the In Praise of Sunflowers stamp set by Power Poppy and decided to see what happens.


I stamped the image on Distress Ink Watercolor Paper using Versafine Clare ink. I immediately covered the ink with clear embossing powder and heat set the image. From there, I pulled out a water brush and a variety of Distress Inks and got to work. Since the image was embossed, I had little trouble staying within the lines so I could apply the color rather loosely. I smushed some ink onto my glass mat (a silicone mat works just as well) and picked up the color with the water brush. I had to play with the colors a bit because using the water brush diluted the ink. By using a combination of layers of color and varying the ratio of ink to water, I was able to get a variety of shades.

I also tried not to overthink the coloring. This was just meant to be a no pressure, easy going, and fun craft project.


Hope this project brought some sunshine your way! Thanks for stopping by!

SUPPLIES

PAPER: Neenah Solar White 110#; Distress Watercolor Cardstock by Ranger; Eat Cake from the
Party Animal Collection by PhotoPlay; Heavyweight Cardstock in Natural by My Favorite Things
STAMP: In Praise of Sunflowers by Power Poppy
INK: Versafine Clare in Nocturne by Tsukineko; Distress Inks in Mustard Seed, Ripe Persimmon, Candied Apple, Mowed Lawn, Forest Moss, Peacock Feathers, Shaded Lilac, Stormy Sky, and Brushed Corduroy
DIE: Large Stitched Rectangle Stackables by Lawn Fawn
EMBELLISHMENTS: Nuvo Fine Detail Embossing Powder in Clear by Tonic Studios

Doodling While Quarantined: WEEK TWO - Pocket Plus A Card A Day By Judi Kauffman for The Queen’s Ink

Still quarantined, still puttering. How about you?

This is Week Two of my Pocket Plus A Card A Day! For the first six days I decided to stick with something comforting - a gold paint pen for backgrounds plus doodling with black and white pens on dark cardstock. For the final day I ended up with two cards rather than one, adding pops of color to reflect the fact that spring is bringing a bright palette back to my yard!
The pocket is super simple - a piece of cardstock embossed with a 3D folder set at an angle on the front.

YOUR TURN
  • Create a pocket. 
  • Stamp, draw, collage, stencil a flat card per day for a week; sign and date each one.
  • Stamp or hand-letter the dates that reflect the contents onto the pocket.

Saturday, April 11, 2020

Keeping Creative While Quarantined: One Table Runner Plus Two Belts = One New Tote Bag! By Judi Kauffman for The Queen’s Ink

My attention span is short, but the days are long. Like many, I have been making masks and have spent time cleaning and sorting. I turned to my linen closet for soft old napkins to turn into masks. While I was at it, I refolded all of the towels and pillowcases and table linens, and discovered a seldom-used table runner that I brought back from Guatemala some time in the 1980s when I worked with a non-profit group that helped women weavers.

The table runner was always too short. It wasn’t enough fabric to turn into a top or skirt, but it was just right for a tote bag! I added two belts - one to decorate the pleated top of the tote and one for the strap. DONE.

No cutting, no hemming - the table runner was already finished on all sides so all I did was sew side seams and corners to create a flat bottom. I hand-sewed the belt trim and strap because I didn’t want the stitching to show and because I had lots and lots of time to spend on the project. Plus, slowing down like that made me feel closer to the weavers whose skilled hands had worked for many hours to make the fabric and the beautiful bands.

YOUR TURN
What do you have around the house that could be made into a tote bag or something else? 

I chose fabric that was ready to go, but a different fabric could be stenciled, stamped or embroidered to cover stains or torn spots before getting its facelift!

*Cocktail napkins would make nice little drawstring bags for jewelry or cosmetics.
*Large bandanas would make great lightweight beach bags.
*Add a drawstring to a pillowcase to make a laundry bag.
*Add straps to a pillowcase instead of a drawstring and you’ve got a knitting bag.

If you’re new to sewing, an online search for free patterns is in order.

Stay safe. Be well.

Thursday, April 9, 2020

Creative Puttering While Quarantined: Flower Cards, ATCs, and Bookmarks By Judi Kauffman for The Queen’s Ink

One of the things that has been making me happy during this uncertain time is taking online classes and experimenting with a mix of techniques and projects. Carla Sonheim’s “Flower Crazy” mini class (FREE!) was so much fun! It inspired me to use her ideas in my own way.


The projects you see above and below are a hybrid that incorporates RubberMoon stamps by Elizabeth St. Hilaire, available at The Queen’s Ink, with markers, colored pencils, acrylic paint, Gelly Roll White and Pigma Micron Black pens. And assorted embellishments that I had on hand: Mesh, buttons, staples, stickers, twine.

Keep scrolling past the project photos and you’ll find photos showing the components I made from start to finish. I started with sheets of ready-to-print business cards (part of my stash of unused office supplies!) so when the pages were ready for cardmaking all I had to do was bend along the cut lines and the pieces separated as if I’d spent time measuring and cutting. Easy, easy, easy.

Refer to Carla Sonheim’s class for the how-to. Here are my pages of business cards from start to finish:


SUPPLIES:
  • Stamps by Elizabeth St. Hilaire (RubberMoon)
  • Ink pads in colors of choice (shown: Teal and brown)
  • Acrylic paint in white
  • Gelly Roll White 10 (Sakura)
  • Pigma Micron Black 01 and 1 (Sakura)
  • Alcohol Markers (Winsor & Newton)
  • Colored pencils
  • Adhesive
  • Cardstock in assorted colors
  • Sheets of ready-to-print business cards in white
  •  (Or white cardstock)

Monday, April 6, 2020

Keeping Creative While Quarantined: Channel Your Inner Impressionist By Judi Kauffman for The Queen’s Ink

Do you have an old denim- or canvas-covered 3-ring binder sitting in a closet somewhere? Or a sturdy but stained tote bag or purse that has seen better days? If so, this is the time to get out some acrylic paints, a few brushes, and channel your inner Impressionist!

Museums around the world have virtual galleries in which to browse, or look up artists by name. My notebook pays homage to Monet.

No outlines, just spots and splotches of color to create a garden, a forest, a still life, or whatever you feel like doing. Look to nature for inspiration or use your imagination. Either way, your painting will be unique and special!


Two of the three close-up photos above show the inside of the notebook - bright and shiny because the paper is coated and reflects light. The third shows the weave pattern on the outside - colors appear more muted though it’s the same paint.

YOUR TURN
  • Instead of a bag or notebook, paint on a T-shirt, aprons, or jeans!
  • Work on a canvas board or stretched canvas instead of a functional object.
  • Paint in your art journal or onto sheets of heavy paper in a color other than white (textured or smooth finish). Sheets of brown wrapping paper are a good starting point.
  • Cut or tear up the painted papers for collage!
  • Stencil on top of the painted pieces.

Next, paint papers to fill the notebook, OR add lined paper and make lists of things to do when the quarantining ends.

My list starts with these items:
1. Eat out in restaurants 3 times a day for a week!
2. Drop off a pan of brownies at the fire department.
3. Head to the die cutting machine with the 3 children from up the street and make cards.

Thursday, April 2, 2020

Things to Do While Quarantined: Gratitude Bowls By Judi Kauffman for The Queen’s Ink

***CAUTION*** This project is a choke hazard! Keep it away from children and pets!!!

My friend Toni’s pastor suggested a way to feel grateful and remain focused on the good things in the world during these uncertain times. It immediately struck me as something I wanted to do:
  • Choose a small bowl.
  • Find 10 small stones.
  • Put the stones around the bowl.
  • During the day, put a stone in the bowl each time you feel grateful for something that is happening in your life.
  • Repeat each day.
A suggestion I’d like to add:
          Write down the reasons that the stones have been placed in the bowl.
Start a small gratitude journal, write on index cards, make digital notes on your phone - whatever seems appropriate and not burdensome.

OTHER OPTIONS:
          Choose ANY small bowl that is meaningful in some way. Shown above, a stone bowl from my friend Kathy. Shown below, an ornate leaf-shaped bowl from Leela, blown glass bowl inherited from my late friend Gail, an Asian sauce bowl - a thrift shop find, and a hand-painted bowl from Italy that we use for olive oil.

          Instead of 10 stones, choose colorful beads (butterflies!), glass marbles (flat or round, clear or iridescent) or gather ten small random objects from around the house that please you (a pin from Jhone, a pendant from Susan, a leaf I saw take shape in the hands of a blacksmith, a piece of clay that never made it to a project, an old buckle from when I had a waist...


YOUR TURN:
Take a walk around your garden or a park where it’s easy to keep social distance to find the 10 stones, wash them; polish, clear seal, paint or number them.

Pick a number of stones or objects other than 10.

Share this idea with others and encourage each other to finish each day with a filled bowl!

Monday, March 30, 2020

Creative Quarantining: Library Pocket, Journaling Pocket By Judi Kauffman for The Queen’s Ink

To everyone quarantined at home: Stay safe, stay well, and stay creative! Time spent lost in a project is time spent without worries or fears.

I had the nicest compliment from a psychologist friend this morning: She’s seeing her clients remotely via phone and said she’s suggesting some of my ideas to her clients who are also quarantined, especially the one about taking photos of meaningful objects and then writing about them or sharing them. She’s even considering taking daily photos of her own to send to her friends and family during her time at home. It is making her see the objects around her in a new way. And seeing in a new way is always important, just seems like it’s more so now than ever.

I don’t know about you, but I’ve been doing a lot more reading than usual the last couple of weeks. (I’m making a dent in the tall stack of books purchased last fall when the used book store had a half-off sale!)
To keep track of what I’m reading I die cut a library pocket and some cards for writing the title, author, and a mini review of a couple of words. (Die set: AccuCut) Of course, I had to decorate the pocket and cards! (Stamps: RubberMoon, Die set: AccuCut)

ANY envelope, pocket, index cards or notebook will serve well! If you have a printer, take a photo of the book cover and glue it onto the review card. Share what you’re doing, post your Library Pocket project on Instagram or other social media.*
Another option:
Instead of keeping track of what you’re reading, keep track of what you’re doing and feeling by writing on a 4x6 card; tuck the cards into a Journaling Pocket. Alternatively, make a collage, gel print, doodle, sketch, or other small art each day.

One pocket will hold an entire week’s worth of cards if the embellishments aren’t too chunky. Let’s hope the quarantine doesn’t require too many pockets!* (Die: AccuCut)

*If you share via social media, please help draw traffic to The Queen’s Ink by giving the link to this post and mention that you found the idea for your Library Pocket or Journaling Pocket on the store’s blog! (Thank you for doing whatever you can for the store during this challenging time. We all want it to hang in now and then reopen and continue to thrive.)

Friday, March 27, 2020

Stay Well by Judi Kauffman for The Queen’s Ink

During stressful times it’s a good idea to turn to comforting and familiar techniques. For me, that involves doodling on dark cardstock using Sakura’s Pigma Micron Black, Gelly Roll White, and Pen-touch Gold pens to make postcards!

I thought I’d incorporate words on some of them, hence “Stay Well” came to mind. The more stressed I am the more detailed the doodles. Needless to say, I was feeling much better when I drew the center postcard, but was absolutely miserable when I worked through the one at the left. No lettering on the leafy mostly-white postcard to the right - I like the way it turned out.
Coloring the background with gold is my way of “Klimtify-ing” the cards.

What’s YOUR go-to comfort project? Don’t delay! Sanitizing the doorknobs can wait a little while and so can reorganizing the linen closet.

Actually, drawing on postcards and baking chocolate chip graham cracker brownies are tied for first place as mine. Fortunately, one of them has zero calories.