Monday, June 26, 2017

Altered Board Books, Part II - by Judi Kauffman for The Queen’s Ink


My post on May 30, Altered Board Books, Part I, began the saga of the round robin a friend and I were doing. It showed the book that she started, the one that will be hers to keep at the end of the project. This time, it’s the book that I started – one with a handle, purchased at a yard sale.


Just like last time, I’m showing only my pages per her request. Just like last time, the theme is ‘favorite quotes’.

And just like last time, there are no instructions – just a supply list and my fond hope that you will find a board book, gesso the pages or cover them with collage papers, and then alter them with your favorite stamps, stencils, paints, pencils and pens, and all sorts of flat and dimensional elements.


I incorporated rubber stamps from The Queen’s Ink along with some from my collection. I computer-generated Michelle Obama’s quote, tore and cut others from postcards, and hand-wrote one as well. Also included: Embossed Shimmer Sheetz (the bit gold queen of hearts playing card), acrylic paint, paint pens, printed papers, purchased embellishments, a frayed label from a T-shirt, gems, glitter dots, gift wrap tissue, newsprint, flat and dimensional alphabet stickers, ledger paper, jumbo star sequins, a dragonfly-shaped button, and more. The dimensional elements add to the visual impact and the thickness of the book – it doesn’t stay closed, it opens like a fan at one side.

The cover isn’t done, so stay tuned! And I may re-visit some of the pages if they start to look like more is needed…


YOUR TURN
Go to a yard sale sometime soon. Pick up a board book for a quarter or a buck. (Or look through your kids’ castoffs…)


Pick up the rest of the supplies at The Queen’s Ink and get started! This can be a solo project or invite a friend to join in.


SUPPLIES:
  • Gesso (black, white)
  • Acrylic paints
  • Cheap paintbrushes (Patti stocks Seth Apter’s favorites!)
  • Matte medium
  • Colored pencils
  • Rubber stamps
  • Permanent multi-surface inkpad
  • Stencils (shown: StencilGirl Products)
  • Stickers
  • Sequin waste
  • Stapler
  • Assorted embellishments
  • Paint pens (shown: white)
  • Fine nib permanent ink pens in black (Sakura Pigma Micron 1mm and 01mm)
  • Printed or computer-generated quotes
  • Collage papers
  • Adhesives formulated for the surfaces you’ve selected

Tuesday, June 20, 2017

Beaded Branch Abacus by Judi Kauffman for The Queen’s Ink


I thought I’d go in a different direction for this week’s project. It has undertones of mixed media, and I think my high school math teacher would be pleased with what I designed…An abacus!

I found a photo with a quick online search to use as a reference and made an abacus with glass beads, wire, and a branch. It’s a real (functional) abacus that can be used when it’s flat on a table, but it turns into something that’s decorative and sculptural when it’s hanging. It’ll be interesting to see if anyone recognizes it as an abacus without my giving away the secret…


This project is a good way to use up a lot of beads. It looks great when it’s hanging in a window with light streaming through. And it is super easy and lots of fun to make.


Instead of a step-by-step tutorial, I’m providing only the idea and a few photos. No two people have the same collection of beads, branches are all different – so make it your own way and in a color combination that pleases your eye.

Other Options:
  • Use a painted dowel instead of a branch and stick with a more structured look.
  • Use clay beads instead of glass.
  • Instead of a wall hanging, use memory wire for the top and bottom rows, regular wire in between, and use same-size beads to create a wearable abacus bracelet. (When you wear it you can use it as a tip calculator. I made one with faux pearls and it’s a conversation starter – kids LOVE it…)

  
YOUR TURN

Tips:
  • Gather some beads, making sure that the wire you’ve chosen will easily fit through the holes.
  • Plan the abacus on a kitchen towel so the beads won’t roll around.
  • Rearrange until you’re happy with the way things look.
  • Have fun!

Monday, June 12, 2017

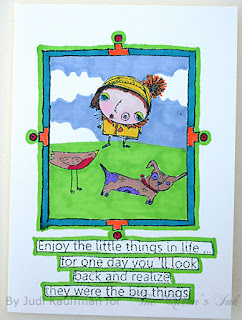
Make New Friends, but Keep the Old! - By Judi Kauffman for The Queen’s Ink


Back in around 2000, my friend, New Mexico artist Jo Rango and I designed rubber stamps for Red Castle, Inc. Her quirky creatures and unique frames were among my favorite stamps, then and now.


Fast forward to 2017. These days many of my newest favorite stamps are from RubberMoon (Kae Pea and other artists), Lynne Perrella, Dyan Reaveley, and the late Laurel Burch – all of the stamps among my ‘finds’ at The Queen’s Ink!


I thought it would be fun to host a ‘mixer’ and introduce the friends from my past to my newest acquaintances (call me the ‘match.com of rubber stamps’!) The dance was a success. They got along, just as I’d envisioned. There will be many second and third dates and it looks like there could even be a couple of weddings on the horizon…

It turned into a very long evening, resulting in a batch of hanging ornaments and simple greeting cards, the kind of projects that are fast, easy, and perfect for coloring on-the-go. Some of the stamps were shy (that's a good way of saying that there was a bit of masking needed here and there). Instead of drinks and snacks, I served up markers, pens and colored pencils.

Mission accomplished!

YOUR TURN

Introduce some of YOUR oldest stamps to some of your newest. Get silly (or choose pretty stamps and head for elegant instead). Mix in quirky sentiments (or go for ‘happy birthday’ and other traditional greetings).
 The key is to come up with unexpected juxtapositions that please your eye and make you smile! And then MAIL them to far-flung friends and family, or HAND-DELIVER to neighbors, colleagues, and the folks you live with.

For my projects, the frames are all by Jo (from a sheet called Rango Dragonflies and Friends, just in case you can find it on eBay). The scene with birds, worm and tree in the first ornament shown at the start of this tutorial was done with one of her stamps shown in its original frame. Everything else is from the artists previously mentioned.
Do you have stamps with simple frames? Ornate ones? Stencils, perhaps, or dies that cut frames and borders? Because Jo’s stamps are no longer available, you’ll need to make substitutions. RubberMoon has lots of options. You could draw your own, do some cut-and-paste collage, or create frames with stamps that were not originally intended as frames but that can be combined to make them (like RubberMoon Stampstracts).


Head on over to the web store if you want to shop right now or sign up for classes, and be sure to come by the store to check out what’s new and visit in person. There’s ALWAYS something new!


SUPPLIES:
  • Rubber stamps from RubberMoon, Laurel Burch (Stampendous), Lynne Perrella (PaperArtsy), Dyan Reaveley (Ranger)
  • Coloring medium of choice (Winsor & Newton ProMarkers, Sakura Gelly Roll Medium in White)
  • Inkpad in dark color of choice
  • Cardstock
  • Fine metallic braid, chenille needle 

Monday, June 5, 2017

Finding Inspiration: Carla Sonheim - by Judi Kauffman for The Queen’s Ink

I hope that during five decades of teaching art I’ve been a source of inspiration for my students. Helping others gain skills and confidence in their creativity is my goal and mission. But where do I turn for inspiration? Good question (and one I’ve been asked many times over the years). I turn to the work of other artists and designers as well as to the crayon drawings of children. I look at my surroundings, finding ideas in the colors, shapes and patterns provided by nature as well as manmade objects. I try to be a sponge, absorbing odd bits of information through my eyes and hands.

By a stroke of good fortune, I was hired by several magazines to write profiles about artists and designers. During the two decades when this was part of my day job, I got to interview a wide variety of people. Carla Sonheim was one of them, and even though we haven’t met in person we’ve stayed in good touch. Right from the start she’s been a constant source of inspiration. I follow her blog. I have been her student, taking several online classes, and we’ve exchanged ‘real (snail)’ mail, too.

Once a month Carla posts a photo of a sidewalk crack on her blog and challenges the rest of us to find something in the lines that we can use for a drawing. Most of the time I print the photo and then use tracing paper for my drawings. For some reason, this time I decided to draw right on top of the gray-scale printout.


It’s so much fun to turn the paper upside down and sideways, looking at it until a bird, animal, person, a still life or a scene magically appears! As you can see from the cat above and the mice below, there’s no way to predict what I’ll find.


Sometimes I use a pencil so I can change my mind, erase and revise the basic outlines, but most of the time I commit to the marks and use a broad nib black pen right from the get-go. Then it’s all about adding color and more line work.


I hope you now have a new-found respect for sidewalk cracks, or for that matter cracks in ceilings, walls and roadways. Or the wrinkles and folds in your laundry, the patterns that water makes when it flows from the hose and down the driveway after washing the car… That’s the fun thing about inspiration: It’s everywhere and it’s FREE!

A suggestion for all who keep art journals: Instead of working on loose sheets of paper, work straight in your journal! Glue the printout onto a page, paint and draw right over it.

Instead of 8.5” x 11”, work much larger or scale down to postcard or rotary file card size. There are so many ways to incorporate this kind of ‘seeing’ into whatever you’re already doing.

Be sure to visit Carla Sonheim’s blog and if you leave a comment, tell her Judi sent you!

SUPPLIES:
  • Lightweight paper
  • (optional: Tracing paper)
  • Markers and pens of choice
  • (optional: Colored pencils, paints)
  • Printout of sidewalk crack photos