Tuesday, May 29, 2018

Channeling Picasso and Matisse by Judi Kauffman for The Queen’s Ink

I keep a box on the table next to the die cutting machine into which I toss the little pieces that fall out of die cuts that have been backed with double-sided adhesive, along with small die cuts I make from larger scraps (shapes like circles or folder tabs or clipboard hardware that are under an inch in size).

I started this habit as a way of keeping the table clean and to avoid bending over a short trash can that sits on the floor near the table. Little scraps have a mind of their own and will fly all over the place! Every now and then I empty out the box, but not before I spend some time playing with the pieces before tossing them.
For a long time, I only created whimsical animals and characters like the little fellow above, but this time I decided to channel two of my favorite artists: Picasso and Matisse!


Above are some Picasso-inspired figures. Below are more that channel Matisse.


One thing led to another, and during the same creative marathon I used some newsprint scraps for a pair of cards. They incorporate circles that had been wiped against canvas coasters to remove some black paint to help speed the drying time as well as a bit of quick stenciling. I embossed the left side of one to reinforce the star motif and brushed on some gold paint to add sparkle and highlight the embossing.


YOUR TURN

Start with an Internet image search to give you a sense of what Picasso’s and Matisse’s work looks like, especially the collages and Matisse’s late-in-life paper cutouts. Use them for inspiration.

1. Save a bunch of adhesive-backed scraps from die cutting words and leaves and other such shapes. Hint: Scraps from large, flourish-filled words and leafy branches provide fabulous leftovers!

2. Cut some circles in your favorite dark colors, cut some white cardstock rectangles. Alternatively, work directly into an art journal or onto ATCs or folded note cards.

3. Arrange and rearrange the little scraps, cutting them here and there as needed. (It’s not cheating!) 

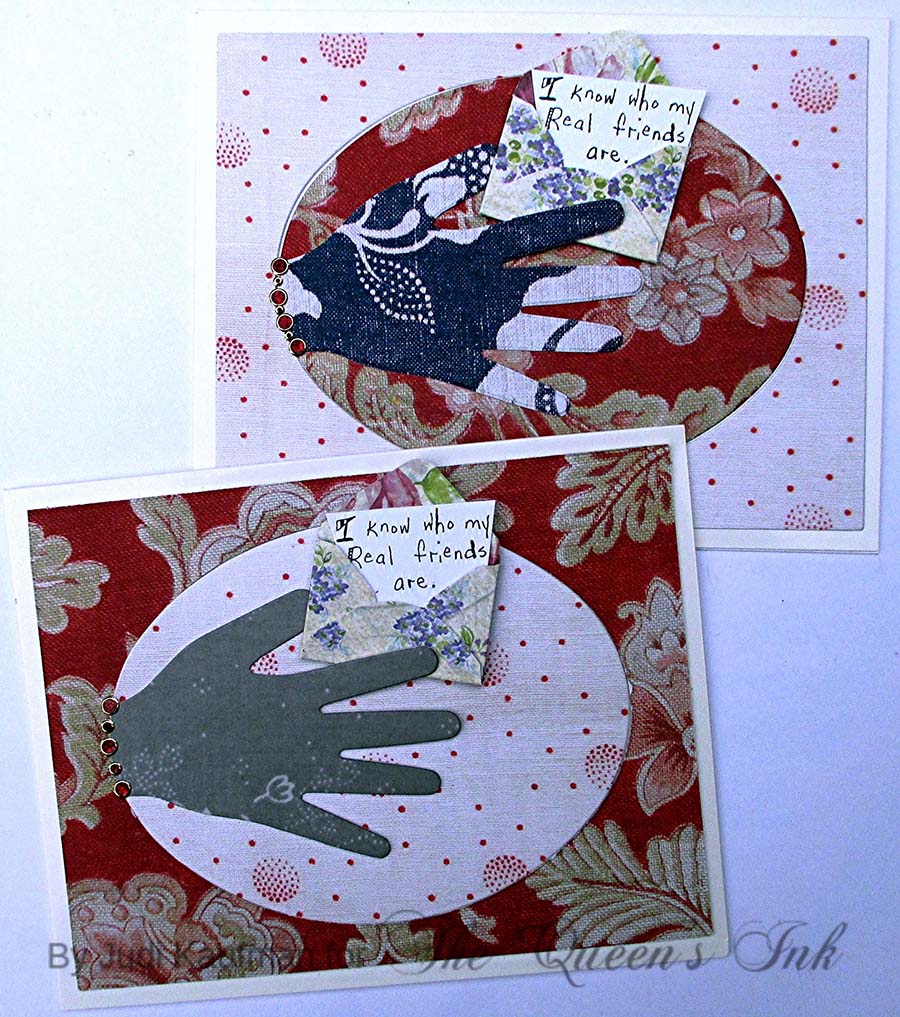
4. Expose the adhesive on the back of the shapes and adhere when things look good to your eye! Turn the circles into ornaments or add them to card fronts. Add the decorated rectangles to card fronts or mat and frame your favorites.

5. Add Lure Eye stickers for eyeballs and use almonds, elongated ovals and other shapes that resemble eyes and eyelids.

6. Keep going: Use other kinds of scraps like newsprint. Stencil or stamp on the pieces, use them for cards.

7. Optional: At any stage in the process use an embossing folder to add pattern and texture.

Supplies:

  • Die cut scraps backed with double-sided adhesive prior to die cutting
  •   (origami paper, Shimmer Sheetz, velvet paper sheets, cardstock)
  • Painted newsprint scraps
  • Solid color cardstock in assorted colors
  • Stencils (shown: Seth Apter for StencilGirl Products)
  • Paint
  • Circle dies or templates
  • 5mm and 7mm Lure Eye stickers (Stanislaus Imports, www.lasioux.com)

Wednesday, May 23, 2018

Silly Doodling by Judi Kauffman for The Queen’s Ink

This is the project I take with me when I travel. It’s what I turn to when I’m stressed or in need of a smile. It’s my go-to for making postcards. And it’s the reason I get my gold and white pens by the DOZEN! 

Everything needed fits into a small zippered pouch: Quarter sheets of dark red cardstock plus white, black, gold and turquoise opaque ink pens and a paper towel or two to protect whatever flat surface I’m using under the projects – the tray on the plane, a tissue box, a book or magazine, or my trusty lap desk that has a pillow attached beneath the hard surface.

Care to join me?

1. Cut some pieces of lightweight white computer printer paper or tracing paper into quarters. Practice doodling the outlines for some imaginary flowers or whimsical animals, making sure that something in the design touches all four edges of the rectangle – hands, feet, skirts, leaves, wings, ears, heads…Don’t draw eyes or petals or any other details yet – just draw the basic outlines!

2. Using a pencil to draw very pale outlines*, trace the designs onto quarter sheets of dark red cardstock or another color like dark pumpkin, olive, or gray, but not navy or black. Put a paper towel or clean sheet of white paper under the cardstock to protect the work surface. Fill in all areas (the negative space) around the shapes with a gold opaque ink/paint pen, covering the pencil lines and extending the gold all the way to the edges of the rectangle. 

*Alternatively, if you’re feeling brave, don’t draw any outlines at all! Simply start filling in the gold AROUND where the outlines would be if you had drawn them… 


3. Now start doodling! Add faces, feathers, petals, and whatever else you think your creation needs…


4. Choose different shape rectangles and make tags, bookmarks, or other projects.

5. Use your creations as postcards, add to a card front or art journal page.

Supplies:

  • Gold opaque ink/paint pens with fine and broad nibs - AKA bullet and chisel (Sakura Pen-touch)
  • White opaque ink pens in various nib sizes (Sakura Gelly Roll)
  • Black permanent ink pens with assorted size nibs (Sakura Pigma Micron and Pigma Graphic)
  • Turquoise opaque ink pen (Sakura Gelly Roll Moonlight)
  • Red cardstock
  • Computer-weight or tracing paper
  • Pencil 

Tuesday, May 15, 2018

Brushstroke Backgrounds Part Three by Judi Kauffman for The Queen’s Ink

Brushstroke Backgrounds One and Two were such popular tutorials that I’m revisiting it with Part Three. This time I used a piece of dark red cardstock that I’d wiped with black and gold paint Talk about easy! This is a fast and fun project.

Before providing instructions, I’d like to take a detour:

It dawned on me that I must sound like I never spend a long time on any projects. That’s not true! I stitch needlepoint on 18 ct. canvas and those pieces take months. I’ve spent many hours working on scratchboard drawings and have embroidered and beaded many garments. When I was a weaver I designed scarves that took days (and made about a dollar an hour when I sold them...). But I figure that cards are meant to be enjoyed and then tossed, so I rarely take more than a few minutes – half an hour at most, to complete something that is, by nature, ephemeral. 

I LOVE MAKING CARDS, I adore decorating envelopes. I do both the pleasure of the process without worrying about what happens once they’ve been stamped and sent.

I have had friends honor me by framing a card now and then, some get perched on a desk or shelf long enough to gather dust, but I envision a card enjoyed for a short time and then discarded or at best tucked away by a person who keeps cards out of habit.

What’s YOUR take on this? Please leave a comment – weigh in, offer your opinion and start a dialogue!

Do you make cards and how much time are you willing to put into them? If not, what would get you started? Do you send cards only to people you think will hold onto them, just to family and friends, a wider circle, to strangers through a charity program? Do you make cards ‘by the batch’ method, like I do, one at a time, often or only when an occasion is imminent?

OK, now back to the tutorial...
Instructions:

1. Randomly brush paint onto sheets of 8.5” x 11” cardstock. (Wipe brushes while working on other projects or create the sheets from scratch.)

2. Cut each sheet in half and each half into three pieces. Glue each one to a Kraft brown A2-size card base.

3. Create a collage on each card front. Arrange and adhere a mix of faux postage or canceled stamps, labels, stickers with words and phrases, computer-generated or hand-stamped sentiments.

The Queen’s Ink has a wonderful selection of stamps and stickers that are perfect for collages like these; next time you’re at the store be sure to look through Tim Holtz’s quirky sheets, Dyan Reaveley’s whimsical sayings, and don’t miss the latest from RubberMoon!

Supplies:

  • Brushstroke Backgrounds (cardstock sheets covered in random paint streaks)
  • Kraft brown cardstock (8.5” x 5.5” per card, folded in half for a side-fold 4.25” x 5.5”)
  • Double-sided adhesive tape, glue stick and/or other adhesive(s) of choice
  • Collage materials – Stickers, labels, canceled stamps, faux postage
  • Stamps and inks

Saturday, May 12, 2018

New Class by Nancy Sheads! Colorful Tropics Featuring Laurel Burch, June 26, 2018 at The Queen’s Ink

I am returning to the The Queen’s Ink on Tuesday, June 26th to teach a Copic marker class featuring Laurel Burch stamps from Stampendous!. I will lead the class through the creation of two cards, highlighting the use of other media such as stencils, embellishment mousse, and embossing powders to create backgrounds to compliment your Copic coloring. Details are below. All necessary techniques are taught in class. Seats are limited, so sign up today! CLASS FEE: $25


Tuesday, June 26, 2018, 1:00 PM – 3:30 PM
Register online or call the Queen’s Ink at (301) 497-9449

BRING TO CLASS: The list below reflects the Copic markers that I will use in class. You can follow along using the same colors OR substitute colors based upon your personal Copic collection. Please bring all your markers to class and make sure your Copics are marked with Washi tape or some other means of identification. Markers are available for purchase at The Queen’s Ink. Students will receive a 10% discount on Copic markers. I will be available prior to class to help with selection.

PLEASE NOTE: You must bring your own markers to participate in class. If you need markers, please contact The Queen’s Ink in advance of class. If you wait until class time, you may not be able to purchase the markers you need.
  • Y02: Canary Yellow
  • Y15: Cadmium Yellow
  • Y19: Napoli Yellow
  • Y32: Cashmere
  • Y35: Maize
  • Y38: Honey
  • YR04: Chrome Orange
  • YG06: Yellowish Green
  • BG13: Mint Green
  • B01: Mint Blue
  • B02: Robin’s Egg Blue
  • B04: Tahitian Blue
  • B66: Clematis
  • V01: Heath
  • V04: Lilac
  • E000: Pale Fruit Pink
  • E00: Skin White
  • E07:  Light Mahogany
  • E21: Soft Sun
  • E23: Hazelnut
  • 0: Colorless blender
OTHER SUPPLIES: Please bring 2-3 ink blending tools and clean foam refills (such as Ranger Mini Ink Blending Tools / Foam Refills), liquid glue that dries clear (such as Ranger Multi Medium Matte), scissors suitable for fussy cutting, foam adhesive squares, and a tape runner adhesive or double-sided tape.


Tuesday, May 8, 2018

'Gimme a Hand by Judi Kauffman for The Queen’s Inkling

These cards are so easy and fast! I always love lots of pattern, but if that’s not your style simply change to fewer prints and mix in some solid colors or go for solid colors and skip the patterns altogether.
I used dies (ovals, circles, rectangles, and small hands) and a punch (the mini envelopes), but you can hand-cut simple shapes instead. Cards can be flat front or window-style, side- or top-fold.

Use these projects as an excuse to stop by The Queen’s Ink for some new 12 x 12 papers. Mix and match with what you might already have on hand. Or if you’re feeling adventurous, stencil or stamp sheets of cardstock with all-over patterns instead of using printed designs!
Simple hands look great on their own, symbolizing friendship, love, and strength. They’re also fun with something to hold – a circle, a coin, an envelope, a ticket, a place card, a note… So many possibilities.

I stuck with simple cards, but the same concepts can be used for more elaborate cards, and can be re-sized for bookmarks, napkin rings, tags, and other items. 

I hope you’ll use these projects to kick-start a big batch of your own!

Supplies:

  • 12 x 12 heavyweight patterned cardstock
  • Dies and punches or shaped templates
  • Double-sided adhesive tape
  • “I know who my real friends are” rubber stamp (RubberMoon)
  • Ink pad in black or color of choice