

It’s
all Seth Apter’s fault! A writer friend was visiting. She brought several of
her notebooks – one of them a composition book with a VERY glittery cover. I
loved it and asked if we could make a trade, but many of the pages were already
filled so I offered to revise the cover instead.
I
showed her the altered playing cards I’d made in Seth’s 52 Card Pickup class
and asked if that style would work for her. I got an enthusiastic ‘Yes!’ and
went to work.
Not
thinking it would end up as a blog project, I didn’t take a ‘Before’ photo, but
here is the ‘After’ – a mix of stenciling, painting, and collage:


You know where this is going,
right? One thing leads to another…
The
newsprint pad had collected a good bit of black gesso from when I’d wiped off
my paintbrush prior to washing it. I tore up the pieces and used a glue stick
to adhere the scraps onto sheets of cardstock. Definitely Seth’s fault – his
favorite brushes are only $2 at The Queen’s Ink.


Because
I already had paints and stencils out on the work table, I altered a couple
more sheets of cardstock.


Before I knew it, I decided to
make a batch of journals! Much
more fun puttering in the studio than cooking dinner. My friend cheered me on. (We
ate out…)

I cut
one of the newsprint scrap-covered sheets in half, left the other one whole,
and added some stenciling, stamping, and collage. (Nathalie Kalbach’s new Mixed
Media Embroidery stamps from RubberMoon had just arrived and were on the table!
And I still had the new Lynne Perrella Collection stamps from PaperArtsy handy
as well…)


I cut
one of the remaining sheets in half, added some more paint, and a bit later
‘framed’ a stamped ATC on each of these two pieces.

Then I
got out my trusty laminating machine and laminated all six pieces. I cut stacks
of 5.5” x 8.5” paper for the pages in the smaller books, kept them as whole
sheets for the larger books, and cut chipboard pieces for the back covers.
I was
almost ready to punch and bind the six journals, but there was one more thing
to do first…


I needed to add actual
embroidery to create texture on some of the stamped areas where I’d used
Nathalie Kalbach’s Mixed Media Embroidery stamps…
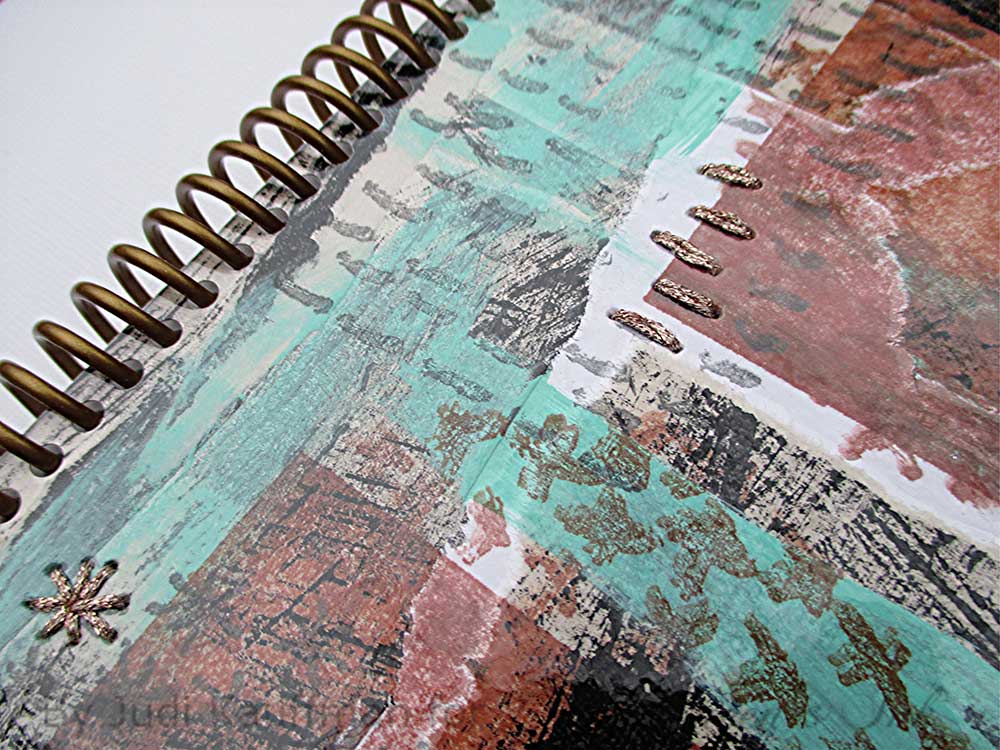
I got
out an awl, pierced holes here and there, threaded a tapestry needle with
metallic braid and happily stitched away till the cover declared itself ‘Done’!
(Stitching on something laminated is super easy and lots of fun.)

Last
but not least, I bound the journals – five with coils, one with disks.


YOUR TURN!
1. Get
out some heavy cardstock.
2. Alter the
sheets with torn paper, stamping, stenciling, paint, collage. Don’t
worry if the sheets curl a bit – heat laminating will flatten ‘em right out!
3. Cut
the sheets in half or quarters for smaller journals, leave them whole for
larger ones.
4. Cut a
matching back cover from chipboard. Cut pages to put inside. Mix
blank and lined paper, add envelopes or whatever you want for the pages.
5. Laminate
the front cover.
6. Punch
covers and inside pages. Bind your journal. (What a good excuse to get that binding system you’ve been eyeing!!!)
7. Option:
Round off the corners of the journal covers and pages, as shown. (This can be
done before binding, one cover or a few pages at a time, or can be done
afterward at a print shop that has a punch that chomps the entire stack all at
once!)
8.Don’t
like the shine of laminated covers? Glue the altered cardstock onto heavy
chipboard for heft and add a coat or two of matte medium to protect and seal
the collage. Dry well between coats.
9. Want more
dimension? Pierce holes and sew on additional embellishments. Add more
embroidery!
SUPPLIES
- Assorted stencils (shown: StencilGirl Products)
- Rubber stamps (shown: Mixed Media Embroidery stamps by Nathalie Kalbach from RubberMoon; Lynne Perrella Collection from PaperArtsy)
- Newsprint
- Seth Apter’s favorite paintbrush ($2 at The Queen’s Ink!)
- Black gesso
- Acrylic paints
- Archival inkpads
- Colored pencils
- Binding system of choice

These journals are fantastic and bound (heh heh) to inspire lots of writing!
ReplyDeleteChuckle...good one, Eurydice! (and thank you for the compliment.)
DeleteThese are jounalicious.
ReplyDeleteLove those!!! Beautiful !
ReplyDeleteFantastic!!!
ReplyDelete