Monday, August 28, 2017

Magic Stamp Plus Altered Collage Papers by Judi Kauffman for The Queen’s Ink

As promised, today’s post is a combination of the two past weeks’ projects – Altered Collage Papers and Magic Stamp block prints with dimensional paint and Nuvo Crystal Drops.

The combo collages can become greeting cards or works of art, or some of both, depending on how you want to approach things. I mixed in some solid color cardstock, but all other elements are from the Inkling, August 15 and 22, 2017. (Take a minute to look back at these two posts if you haven’t already seen them, please. They are the ‘Before’ and today is the ‘After’!)

Give it a try! ‘Audition’ the pieces for each collage you create and work on several at the same time to maximize the possibilities. Don’t glue anything in place until you’re confident about your choices. And be sure to ask think about the questions below. The answers will help determine the direction of your projects.

Would the layers look better with cut or torn edges? Or both? Should you add something dimensional, or stick with relatively flat collages? Instead of cardstock or handmade paper as a substrate, would you prefer canvas? Is it time to work large, or keep things small scale? What kind of adhesives are going to work best? Should you use staples, needle and thread, brads? Are you inspired to try some of the color combinations I chose, or head in an entirely different direction? It’s all entirely up to you!

Here’s a photo gallery to get things rolling –


SUPPLIES
  • Matte medium
  • Adhesives of choice
  • Solid color cardstock
  • Optional: Canvas


    (Review blog posts from August 15 and 22, 2017, for instructions and supplies needed to create altered collage papers and Magic Stamp block prints with textural elements)

Monday, August 21, 2017

Magic Stamp Textures by Judi Kauffman for The Queen’s Ink

If you’ve got Magic Stamp blocks, a heat tool and ink you’re never going to be bored!

This week the ivy on our back fence decided to send up little branches with berries. I snipped a few pieces and brought them to my work table. A sheet of circle-shaped labels was sitting off to the side. I put the two together, got out a Magic Stamp block and my trusty heat tool, and created a stamp.


I spent an hour stamping pieces of cardstock to be used as postcards or incorporated into collage or other projects. And a dozen envelopes, just because I love decorating envelopes…


One thing led to another. I decided to add some texture to the cardstock, so I got out dimensional paints and glitter, as well as some iridescent acrylic paints.


While I was at it, I reached for one of my oldest Magic Stamp blocks. Even though you can wash, dry, re-heat to erase and then re-use the blocks, I keep my favorites. (For a long time - this one was made back in the 1990s, pressed against Mardi Gras beads, a bracelet and a tangle of rubber bands!)


I stamped and added texture to some more pieces of cardstock.


Please come on back next Tuesday, August 29, to see how I’ve combined the pieces from today’s post with the altered collage papers from last week!

SUPPLIES
  • Magic Stamp blocks
  • Heat tool
  • Low relief textures (botanicals, beads, and more)
  • Cardstock
  • Dye-based inks
  • Nuvo Crystal Drops
  • Dimensional paints
  • Iridescent paints
  • Paintbrushes

Monday, August 14, 2017

Altered Collage Papers – Part 1 by Judi Kauffman for The Queen’s Ink

This is one of the easiest projects ever and it’s an idea you can use again and again! Here’s the recipe:

1. Gather some solid color and pre-printed papers in a variety of weights. (I chose handmade mulberry paper.)


2. Randomly stamp and/or paint on each sheet. (I used metallic and iridescent acrylics, dye-based and metallic inks.)

3. Cut and tear up the sheets and combine them, using additional altered or un-altered sheets as a substrate. Mix in additional solid color papers, origami papers, or whatever catches your eye. (Use whatever adhesive or medium you prefer to secure the pieces.)


4. Keep your collage paper sheets out on your work table. (Do not tuck them away or you’ll forget that you made them!)

5. Tune in on August 29 for Altered Collage Papers – Part 2. We’ll explore what to do with the collage papers. (Even though I love the sheets as is, I’m going to be fearless and cut them into pieces…)

SUPPLIES
  • Matte medium or other adhesive of choice
  • Assorted solid color and printed papers in a variety of weights
  • Stamps (large abstract, small motifs, phrases)
  • Inks
  • Iridescent and/or metallic acrylic paints or other opaque paints of choice
  • Brushes

Monday, August 7, 2017

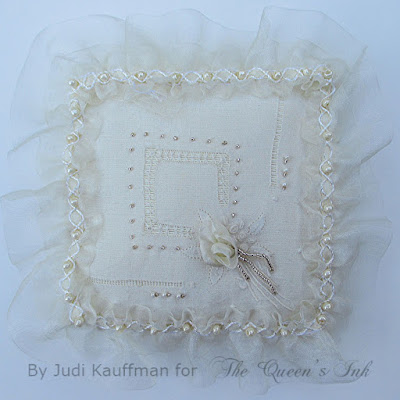
Hanky, Thank ‘Ye by Judi Kauffman for The Queen’s Ink

I love beautiful handkerchiefs. I have many that once belonged to my mother, as well as quite a collection I’ve built on my own over the years. I scour estate sales and bring them back as souvenirs from my travels. Even the most amazing rarely cost more than a dollar and if they’re damaged they usually go for pennies.

That’s the case with the one I used for today’s project. It was in such bad shape that I didn’t feel bad about quartering it to make sachets. There are tiny little rust spots that wouldn’t wash out and one corner was badly torn, holes that could easily be camouflaged with lace.


Some other ideas before I launch into the how-to:
  • Instead of sachets, make pin cushions! (Sew an inner pillow out of sturdy muslin, fill it with sand.)
  • Instead of square sachets, make circles or rectangles. The design on the hanky will guide you in this regard.
  • Create a little pillow and sew a matching coverlet for a doll’s bed.
  • Create a collage with assorted pieces from several damaged hankies. Back with quilt batting and a rigid board; display in a frame. Or skip the board, add fabric as well as batting and make a quilted wall hanging.


PHOTO GALLERY
Take a few minutes to look through the photo gallery before reading the instructions. If you’ve done a lot of sewing, the pictures may be all you need. If you’re a beginner, read on.


INSTRUCTIONS

1. Find vintage (or new) hankies that won’t be ruined by being cut into pieces. If you start with a new hanky, wash it several times and/or tea dye it so it looks old!

2. Gather matching and coordinating fabrics, lace, ribbon, and beads.

3. Cut hanky into squares. Line each square with matching or contrasting fabric. Cut a square the same size for the back of each sachet. If using a contrasting fabric, use that same color for the back.

4. Embellish the front with seed beads, pearls, flower beads, ribbon rosettes, embroidery. Use thread to match the hanky, or use contrasting thread as an accent.

5. Baste or pin the front and the backing square with right sides facing. Sew a small pillow, leaving one side open a couple of inches so it can be turned right side out. (Tip: Add border lace when sewing the two pieces together, or hand-sew it later.) Clip the corners, turn, stuff, hand-sew the opening. Tip: Add lace border during this step.

6. Sew on any additional lace embellishments (gathered pieces, rosettes, leaves, border lace trim, etc.)

SUPPLIES
  • Visit The Queen’s Ink to find ribbons, trims, charms and more
  • Hankies
  • Matching and/or contrasting fabric
  • Sewing thread
  • Seed beads, pearls, lace, trims, and other embellishments
  • Fiberfill