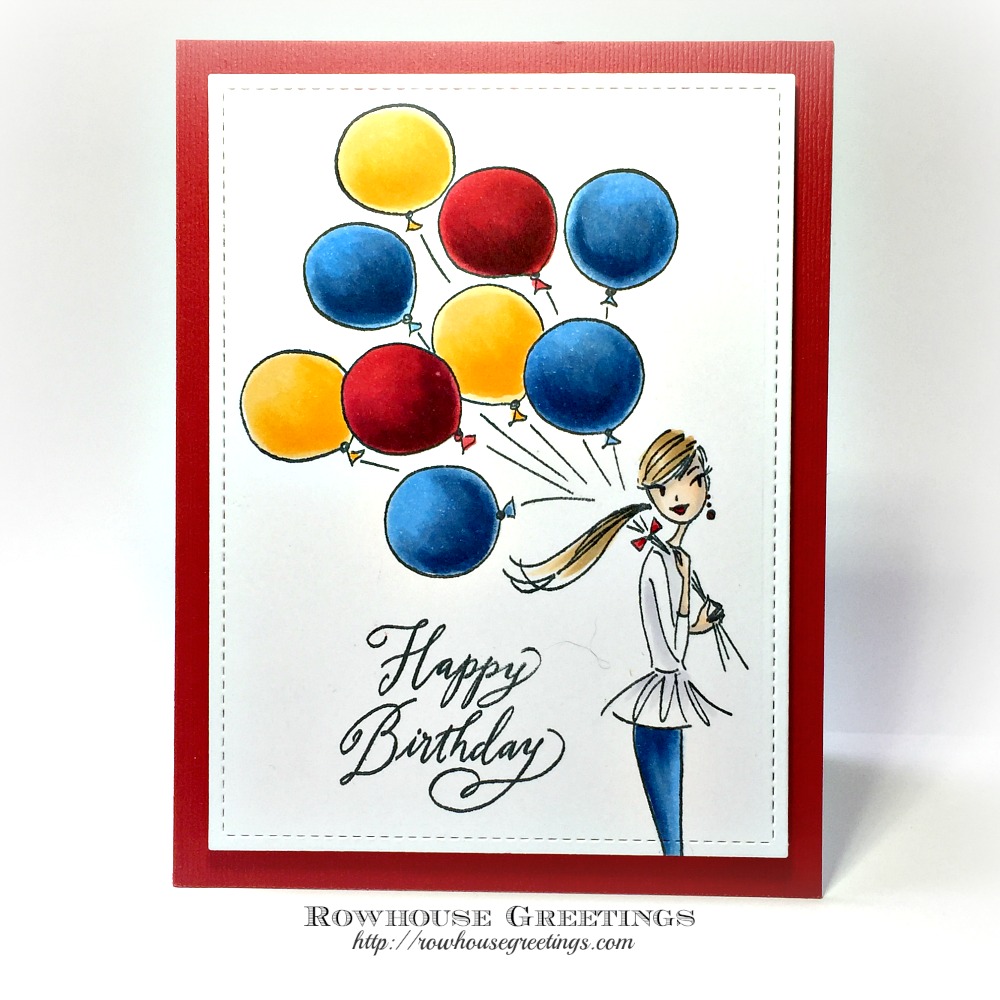
Showing posts with label Penny Black. Show all posts

Friday, July 10, 2020

Copic Stamping - Together by Penny Black - by Nancy Sheads


GOOD MORNING FRIENDS!  I wanted to share a card I made recently featuring the cling stamp Together by Penny Black. Usually these stamps are colored using dye inks, watercolors or water based markers. But I like to color and stamp them using my Copic markers.


The short explanation of the technique is that I place the stamp in my Misti and color directly on the stamp with my Copic markers. I lightly misted the cardstock with Colorless Blender and then stamp the image. The Colorless Blender reactivates the ink on the stamp and leaves and impression on the paper. I explained the how-tos of this technique in a previous post so I'm going to link to it to save time.


I've found that the key to getting a clear image is using Spectrum Noir cardstock instead of X-Press It for the paper. Other paper may work, but I had Spectrum Noir in my stash. And while I used Colorless Blender to reactivate the ink, isopropyl alcohol may work as well, but I didn't test it. All Copic refills, including Colorless Blender, are hard to find right now so you may need to try isopropyl. Spritz the blender lightly on the paper - I found that the small Ranger Mini Misters were perfect for this technique. Just be sure that you are working in an area with good ventilation.

The design of the card was influenced by a card made for Penny Black by designer Jill Foster. Of course, I can't find the card now to link to it, but the idea of the blue inked background and the creating the frame from the Simple Stackers die came from her. For my background, I lightly blended from corner to corner using Distress Ink in Salty Ocean.

The sentiment was stamped with Versafine Clare and heat set with clear embossing powder.

Hope you found some inspiration. Thanks for stopping by and I’ll see you again soon!

~ Nancy ~

SUPPLIES

Paper: Neenah Solar White 110#; Spectrum Noir Ultra Smooth Premium Cardstock by Crafter's Companion
Stamps: Together by Penny Black; Magical Friendship by Penny Black
Dies: Simple Stackers by Penny Black; Classic Stackers by Penny Black
Inks: Versafine Clare in Nocturne by Tsukineko
Embellishments: Nuvo Embossing Powder in Crystal Clear by Tonic Studios
Copics: B12, B24, B26 (flowers); YG03, YG17 (leaves); Colorless Blender Refill

Friday, March 9, 2018

New Class! Calm, Carefree and Colorful - April 3rd, 2018 at the Queen's Ink

I'm returning to the The Queen's Ink on Tuesday, April 3rd to teach a new Copic marker class. In this workshop, we'll create three cards featuring the fun and exuberant images from Penny Black and sentiments from Ranger. The images are colored using a very limited set of Copic markers. Details are below. All necessary techniques are taught in class. Seats are limited, so sign up today! CLASS FEE: $25


Tuesday, April 3, 2018, 1:00 PM - 3:30 PM
Tuesday, April 3, 2018, 6:00 PM - 8:30 PM
Register online or call the Queen's Ink at (301) 497-9449


BRING TO CLASS: The list below reflects the Copic markers that I will use in class. You can follow along using the same colors OR substitute colors based upon your personal Copic collection. Please bring all your markers to class and make sure your Copics are marked with Washi tape or some other means of identification. Markers are available for purchase at The Queen’s Ink. Students will receive a 10% discount on Copic markers. I will be available prior to class to help with selection.

PLEASE NOTE: You must bring your own markers to participate in class. If you need markers, please contact The Queen's Ink in advance of class. If you wait until class time, you may not be able to purchase the markers you need.
  • V20: Wisteria
  • Y32: Cashmere
  • Y35: Maize
  • Y38: Honey
  • R35: Coral
  • R37: Carmine
  • R59: Cardinal
  • BG0000: Snow Green
  • B0000: Pale Celestine
  • B32: Pale Blue
  • B34: Manganese Blue
  • B37: Antwerp Blue
  • E000: Pale Fruit Pink
  • E00: Cotton Pearl (formerly Skin White)
  • E21: Soft Sun (formerly Baby Skin Pink)
  • E51: Milky White
  • E53: Raw Silk
  • E55: Light Camel
  • 0: Colorless Blender
OTHER SUPPLIES: Please bring scissors, foam adhesive squares, and a tape runner adhesive or double-sided tape.


Thursday, February 1, 2018

New Class! Everyday Greetings by Nancy Sheads - February 27, 2018 at the Queen's Ink

I'm returning to the The Queen's Ink on Tuesday, February 27th to teach a Copic marker card class.  In this workshop, we'll make three cards featuring stamps from RubberMoon and sentiments from Penny Black. The images are colored using a very limited set of Copic markers. Details are below. All necessary techniques are taught in class. Seats are limited, so sign up today!

Tuesday, February 27, 2018, 1:00 PM - 3:30 PM
 Tuesday, February 27, 2018, 6:00 PM - 8:30 PM
Register online or call the Queen's Ink at (301) 497-9449

BRING TO CLASS: The list below reflects the Copic markers that I will use in class. You can follow along using the same colors OR substitute colors based upon your personal Copic collection. Please bring all your markers to class and make sure your Copics are marked with Washi tape or some other means of identification. Markers are available for purchase at The Queen’s Ink. Students will receive a 10% discount on Copic markers. I will be available prior to class to help with selection.

PLEASE NOTE: You must bring your own markers to participate in class. If you need markers, please contact The Queen's Ink in advance of class. If you wait until class time, you may not be able to purchase the markers you need.
  • Y02 - Canary Yellow
  • Y15 - Cadmium Yellow
  • Y19 - Napoli Yellow
  • YG06 - Yellowish Green
  • YG09 - Lettuce Green
  • B32 - Pale Blue
  • B34 - Manganese Blue
  • B37 - Antwerp Blue
  • R35 - Coral
  • R37 - Carmine
  • R59 - Cardinal
  • C4 - Cool Gray No. 4
  • 0 - Colorless Blender
OTHER SUPPLIES: Please bring scissors, foam adhesive squares (I used Scrapbook Adhesives 3D Thin Foam Squares), and a tape runner adhesive or double-sided tape.


Thursday, January 25, 2018

Va-Voom by Nancy Sheads for The Queen's Ink


Welcome back to The Queen's Inkling!

Sometimes you see an image that you just know that you have to color. That's how I felt about Va Voom by Penny Black. Every time I stopped by The Queen's Ink, I'd picked up the stamp and then put it back down. Picked it up. Put it back. For weeks. Finally, I decided that it was a sign - I needed to color this stamp. So the next time I picked it up, it went home with me.


This image has such an exuberance that it needed bright colors. Frankly, I loved the way it was colored on the stamp packaging so I just decided to go with the flow. Sometimes it's nice to just color without worrying about color schemes (although I did modify - albeit slightly - the colors of the flag). For the sentiment, I added one of the new Letter It clear stamp sets by Ranger.

So, is there an image that you absolutely have to color (but haven't yet)? Apparently there's now vacancy at the top of my list!

Supplies

Paper: Neenah Solar White #110; Mini Pack Paper for Markers by Copic; Sunshine Three by Authentique
Stamps: Va Voom by Penny Black; Celebration by Ranger
Inks: Memento in Tuxedo Black by Tsukineko; Versafine in Onyx Black by Tsukineko
Copics: E000, E00, E21, E11 (skin); Y32, Y35, Y38 (dress); B00, B02, B06 (bow); Y32, Y35, Y38, R35, R37, B00, B02, B06 (hat); W1, W3, W4 (dog); B00, B02, B06 (dog's sweater); B34, R35, R37 (scooter); W2, W4, W6 (tires)

Friday, November 10, 2017

Mixed Media Tags Featuring Red Castle Stamps by Nancy Sheads for The Queen's Ink


Welcome back to the Queen's Inkling!

I'm back today with a project that is a first for me - mixed media tags! My project features stamps from Red Castle (available exclusively at the Queen's Ink) and Penny Black as well as inks and stencils from Tim Holtz and Ranger.


As you know, my primary medium is Copic markers and the end result is usually a handmade card, but I've been experimenting with other media, including watercolors, colored pencils, and Distress Inks. These simple tags provided the perfect opportunity to explore color and texture with supplies that I already had at hand.

INSTRUCTIONS

I work in a relatively small space and knew that things could get messy quickly. I covered my work surface with an Easy Clean Mat from Tonic to protect it and speed clean up when I was finished.
  1. Using a blending tool, apply Distress Ink to one side of a #8 manila craft tag.
    In the case of the first tag, I started in the middle with Mustard Seed, blending each side with Spiced Marmalade followed by Picked Raspberry. For the second tag, I started at the bottom with Chipped Sapphire, working upward from dark to light with Peacock Feathers and Broken China, ending with Cracked Pistachio. I followed with a second coat to make sure that the inks were well blended and coverage was even. 
  2. Lightly spritz the tag using a mini mister filled with plain water.
    The water will activate the ink and create a pattern as it dries. Use as much or as little as you want to get to desired effect.
  3. Once the ink has dried, stamp the images to be embossed with Versamark Ink. 
    I used Leaves Set 3 by Red Castle Stamps. The images are deeply etched and leave a clear impression. I particularly liked the botanical images and chose those for my tags.
  4. Cover with embossing powder and heat set the images.
    Be sure that your heat gun has had a chance to warm up first to reduce warping of your tag.
  5. Decide the placement of your stencils and apply Texture Paste with a palette knife. Wash your palette knife and stencil immediate with water. Allow Texture Paste to dry completely.
    Do not use a heat gun to dry the texture paste as it may cause bubbling (unless that's the effect you want!).
  6. Once texture paste is dry, lightly dab and blend Distress Ink in the color of your choice over the raised stenciled areas. 
    You can either select a contrasting color to make the stenciled image stand out or match the ink to the background to create texture without additional contrast.
  7. Stamp any additional sentiments using a stamping platform.
    I selected sentiments and a butterfly image from the Spiritual Snippets Stamp Set and the Snippets Stamp set, both by Penny Black. I used a Tim Holtz Stamping Platform so that I could stamp multiple sentiments at the same time using Versafine Ink in Onyx Black.
  8. Apply Distress Micro Glaze to seal inks.
    A little goes a long way! Buff with a soft towel (I actually used a paper towel) to remove excess.
  9. Add a ribbon or other embellishments as desired.
    Don't forget to sit back and admire your work!

SUPPLIES

  • Tonic Essentials Easy Clean Mat
  • #8 manila craft tags 
  • Distress Inks: Mustard Seed, Spiced Marmalade, Picked Raspberry, Cracked Pistachio, Broken China, Peacock Feathers and Chipped Sapphire
  • Ranger Mini Round Ink Blending Tool and Foam Applicators (one for each ink color)
  • Ranger Inkssentials Mini Mister filled with plain water
  • Stamps: Leaves Set 3 by Red Castle Stamps; Spiritual Snippets by Penny Black; Snippets by Penny Black
  • Tsukineko Versamark Embossing Ink
  • Stampendous Detail White Fine Opaque Embossing Powder
  • Heat gun
  • Palette knife
  • Ranger Texture Paste (opaque matte finish)
  • Various stencils (I used the custom stencil included in the Tim Holtz Distress Mixed Media Spray Stain Kit)
  • Tim Holtz Stamping Platform
  • Tsukineko Versafine Ink in Onyx Black
  • Tim Holtz Distress Micro Glaze
All supplies are available at the Queen's Ink. Stop by and be inspired!

Tuesday, October 31, 2017

Little Monsters Cards featuring Paper Artsy and Penny Black


Welcome back to the Queen's Inkling! 

I just finished teaching the Little Monsters class at The Queen's Ink and wanted to show off the cards made for the class. They all feature the quirky and fun images from Paper Artsy paired with a more traditional Penny Black sentiment stamp. This is the first of the three, featuring a smiling, happy monster ready to hug you and probably willing to go home with you!

The background was first colored with a variety of Copic markers in shades of blue and blue green (see below for exact colors). I then dampened a scrap of terry cloth with colorless blender and dabbed the shaded area with the fabric, adding some texture to the background. This is one of my favorite ways to add a background to an image colored with Copics. Students like the technique as well because the colors do not need to be perfectly blended - an added plus when you're just starting out using Copics.

The second card featured quirky flowers from Paper Artsy that are fun to color. I embellished them with some dots and dashes made with a Sakura Gel Pen in white. I thought it added to the eccentric nature of the image.


The third card featured another of the monster kids from Paper Artsy. I loved the juxtaposition of this batty girl with the sentiment from Penny Black. Here's a young lady definitely willing to be herself!


All stamps and Copic markers are available from The Queen's Ink. Be sure you also check out the schedule of coming events - you don't want to miss out on all the fun!

Supply List 

CARD 1
Stamps: ZA02 by elenazinki Art from Paper Artsy; Happy Thoughts by Penny Black
Copics: BG0000, B000, B01, BG10, colorless blender with terry cloth for texture (background); Y02, Y15, Y19, R22, B02, B06 (head); Y15 (hands); R20, R22, B06 (pants); YG09, R22 (sleeves); YG05, YG09, B01, B02, B06 (shoes)

CARD 2
Stamps: ZA09 by elenazinski Art from Paper Artsy; Happy Thoughts by Penny Black
Copics: YG05, YG09, Y02 (leaves); Y02, Y15, Y19, YG05, YG09 (top flower); B06, YG05, YG09, Y02, YG15, YG19 (middle flower); YG05, YG09, Y02, R22 (bottom stalk)

CARD 3
Stamps: ZA02 by elenazinki Art from Paper Artsy; Happy Thoughts by Penny Black
Copics: E000, E00, E02 (face); E000, E02 (hands and legs); R20, R22 (hair); B000, B01, B04, B06 (dress); Y02, Y15, Y19, R22 (wings); B06 (shoes)

Saturday, October 28, 2017

Red Castle Stamps Project by Nancy Sheads for the Queen's Ink


Welcome back to the Queen's Inkling!

Nancy here today on behalf of The Queen to announce that all remaining sheets of rubber stamps from Red Castle Stamps are now exclusively available at The Queen's Ink. There are sixty individual collections and only 2 or 3 sheets left for many of them. They will be sold first-come, first-served. These stamps are deeply etched and create a clear, crisp impression. Subject matter ranging from antique images of cats, leaves, and vases to classic art, the Gibson Girls, canaries, alphabets, snowflakes, dominoes, textures, prayerful expressions, and more.

To inspire you, I've put together a simple, but elegant card featuring an image from Red Castle's Leaves Plate 4. I used the new Tim Holtz Stamping Platform to stamp the image on watercolor paper with Versamark ink. Since the stamps are unmounted, I set up the stamping plate as if I were using a clear stamp and adhered the stamp to the plate with a low-tack double-sided tape. 
I recently acquired a set of the Nuvo Aqua Flow pens and decided that this would be the perfect opportunity to try them out. I dabbed a little color along the vein lines of the leaf and blended it out with a damp watercolor brush. Once the ink dried, I fussy cut the leaf and mounted it to the card with foam tape for added dimension.

The design papers are from the Bountiful Collection by Authentique, available from the Queen's Ink. I selected a sentiment from Penny Black's Heartfelt stamp set and used Versafine ink in Vintage Sepia to coordinate with the autumn tones of the card.

Hope my project has inspired you! Be sure to stop by the Queen's Ink to check out the new products available in the store. And remember - these Red Castle Stamps are only available in limited quantities. Once they're gone, they're gone! So don't miss out on this unique opportunity to stock up on a high quality stamp.

Supplies

Paper: Neenah Solar White 110#; Watercolor Paper by Strathmore; Bountiful One and Bountiful Six by Authentique
Stamps: 42031 - Leaves Plate 4 by Red Castle Stamps, available exclusively at The Queen's Ink; Heartfelt by Penny Black
Dies: A2 Matting Basics A & B by Spellbinders
Embellishments: Gold Fine Detail Embossing Powder by Ranger
Inks: Versafine in Vintage Sepia by Tsukineko; Versamark by Tsukineko; Nuvo Aqua Flow Pens by Tonic Studios in Red Apple, Fresh Green, Lemon Zest, Spiced Ginger

Wednesday, October 25, 2017

A Little Penny Black Magic by Nancy Sheads for the Queen's Ink

Welcome back to The Queen's Inkling!

Nancy here today with another Copic holiday project featuring 
the Joy to the World, Believe, and Joyful Wishes stamp sets from Penny Black and
new holiday design papers from the Vintage Christmas Collection by Authentique,
all available at The Queen's Ink.


I love the adorable cats, mice, and hedgehogs featured in many of the Penny Black stamp sets. I hope you do too because I'm going to be featuring more of them in future blog posts. The images are perfect for someone just starting with Copic markers because they are quick and easy to color with a limited number of markers. I also like to mix and match different styles of paper and stamps. Initially, I thought that I wanted a background that was brighter, contemporary, and more graphic. However, the traditional pattern of Authentique's Vintage Christmas Four ended up being the perfect complement to this fun and quirky Penny Black critter, adding visual interest without competing with the central image. 

Students often ask me about the paper that I use for Copic coloring. I've experimented with various papers suggested for use with Copic markers, including papers by Hammermill, Neenah, Cougar, and Spectrum Noir. When selecting a paper, my testing criteria includes:
  1. Does the paper have a smooth surface? A rough or textured paper may create a drag on the marker as you color, affecting blending of the ink.
  2. How easily does it blend? Some papers work better than others for achieving a smooth ink blend.
  3. Does the ink feather or over saturate the paper? 
  4. How well does the paper interact with colorless blender? Important if you are using blender for special effects or color removal.
  5. Is the paper acid-free? 
Papers recommended by some of my friends were not necessarily a good choice for me. I found that X-Press It Blending Card by Copic works best with my particular style of coloring so that is the paper that I use for personal projects as well as projects in the classroom.  If you'd like to give it a try, stop by the Queen's Ink where you'll find not only X-Press It, but a wide range of Copic markers and other supplies that the store has to offer.

Supplies

Paper: Neenah Solar White 110# (card base); X-Press It Blending Card by Copic; Bazzill Basics in Devil Red; Vintage Christmas Four by Authentique 
Stamps: Joy to the World by Penny Black (image); Believe by Penny Black (front sentiment); Joyful Wishes by Penny Black (inside sentiment)
Inks: Memento in Tuxedo Black by Tsukineko; Versafine in Onyx Black by Tsukineko 
Dies: A2 Matting Basics A by Spellbinders; A2 Matting Basics B by Spellbinders 
Copics: E00, E02, C3, C5, RV10 (cat); R35, R46, R59, YG03, YG67 (gift); E30, E31 (shadow)

Friday, October 20, 2017

Last Chance! Little Monsters Copic Coloring Class - Tuesday, October 24, 2017

Welcome back to the Queen's Inkling!

Nancy here on behalf of the Queen with an important announcement!

This is your last chance to join in on the fun in the Little Monsters Copic Coloring Class at the Queen's Ink. We'll make three cards featuring stamps by Paper Artsy with sentiments from Penny Black. Basic understanding of Copic shading is helpful, however I will cover all necessary techniques in class. Supply list provided below. Seats are limited, but there's still room for you to join us, so sign up today! 

Little Monster's Copic Coloring Class
Tuesday, October 24, 2017, 6:30PM – 8:30 PM 

To register, call the Queen's Ink at (301) 497-9449.


BRING TO CLASS

COPIC MARKERS. The list below reflects the Copic markers that I will use in class. You can follow along using the same colors OR substitute colors based upon your personal Copic collection. You will need a blendable selection of yellows, greens, and blues. Please bring all your markers to class and make sure your Copics are marked with Washi tape or some other means of identification. Markers are available for purchase at The Queen’s Ink. Students will receive a 10% discount on Copic markers. I will be available prior to class to help you with your selections.
  • R20: Blush
  • R22: Light Prawn
  • Y02: Canary Yellow 
  • Y15: Cadmium Yellow 
  • Y19: Napoli Yellow 
  • YG05: Salad 
  • YG09: Lettuce Green 
  • BG0000: Snow Green
  • BG10: Cool Shadow
  • B000: Pale Porcelain Blue
  • B01: Mint Blue
  • B02: Robin’s Egg Blue
  • B04: Tahitian Blue 
  • B06: Peacock Blue
  • E000: Pale Fruit Pink 
  • E00: Skin White 
  • E02: Fruit Pink 
  • 0: Colorless blender
  • Copic Colorless Blender refill (the smaller 25cc bottle is sufficient).
OTHER SUPPLIES. Please bring the following to class:
  • Uniball Gel Pen or Sakura Gel Pen in White
  • Tape runner adhesive or double sided tape
  • Scissors

Thursday, October 12, 2017

Let Me Introduce Myself

The Queen's Ink is pleased to announce that we will be offering a series of Copic and card making classes as part of our regular monthly class offerings. We are delighted and excited to welcome Nancy Sheads (Copic Colorist extraordinaire, so sayeth the Queen!) to our teaching staff.  Nancy is a patient and easy going spirit, a wonderful teacher, very creative, and with a great eye for color. She has generously made many of the card sample we have on display in the shop. Check out our current class offerings on line and sign-up for one of her great classes. Nancy will also be contributing to our Blog regularly with Copic techniques and great card ideas. Read on and get to know more about the newest member of the Queen's Court!

Artist Nancy Sheads

Did you know that the Queen's Ink is once again offering classes in Copic coloring? Yes, it's true and since I'll be leading you on your Copic journey, let me step in here and introduce myself.

Example from Colors of Autumn Copic Class
Some of you may know me from my creative pursuits as a member of the Power Poppy Instant Gardener and the Passionate Paper Creations Design Teams. I can also be found in my corner of the Internet at Rowhouse Greetings and on Instagram.

I've been a crafter for many years - my grandmother taught me to crochet when I was five years old - and over the years I learned a variety of crafts including knitting, sewing, quilting, and needlepoint. A few years ago, I became interested in card making and fell into Copic coloring. Since that time, I've had the opportunity to study with some of the best instructors – Rhea Weigand, Jennifer Dove, Cindy Lawrence, and Debbie Olson – who have always gone out of their way to help me improve my craft.

My teaching philosophy is simple - I want you to feel confident when you color and have fun with your markers. In class, I'll walk you through the techniques you'll need in order to complete the class projects. My goal is for you to be able to incorporate the techniques and skills you learn in class in order to develop a style that is uniquely your own.

When I first started coloring, I only had a few Copic markers in my collection, primarily a variety of reds, greens, and yellows so that I could make that season's holiday cards. Over time as I started coloring other images – flowers, people, landscapes – I added to my Copic collection with the colors that I needed for the types of images that I wanted to work on.

I realize that building a collection of Copic markers can be a significant investment and where possible, I try to limit the number of markers used in class. For each class, I list the markers that I'll be using for demonstration purposes, but you should feel free to bring all of your Copic markers to class and substitute as necessary so that you can still participate. If you want to expand your collection, The Queen's Ink is fully stocked with Copic products and students receive a discount on Copic markers.

Check out the class schedule for the latest offerings and call the shop to register. My classes are full of fun, laughter, and good times! You won't want to miss out!

I'll also be blogging here at the Queen's Inkling with new projects that will hopefully give you some crafty inspiration. Upcoming projects include holiday cards featuring stamps by Power Poppy and Penny Black as well as some of the new holiday design papers by Authentique.